10 Reasons Why Plants Fade

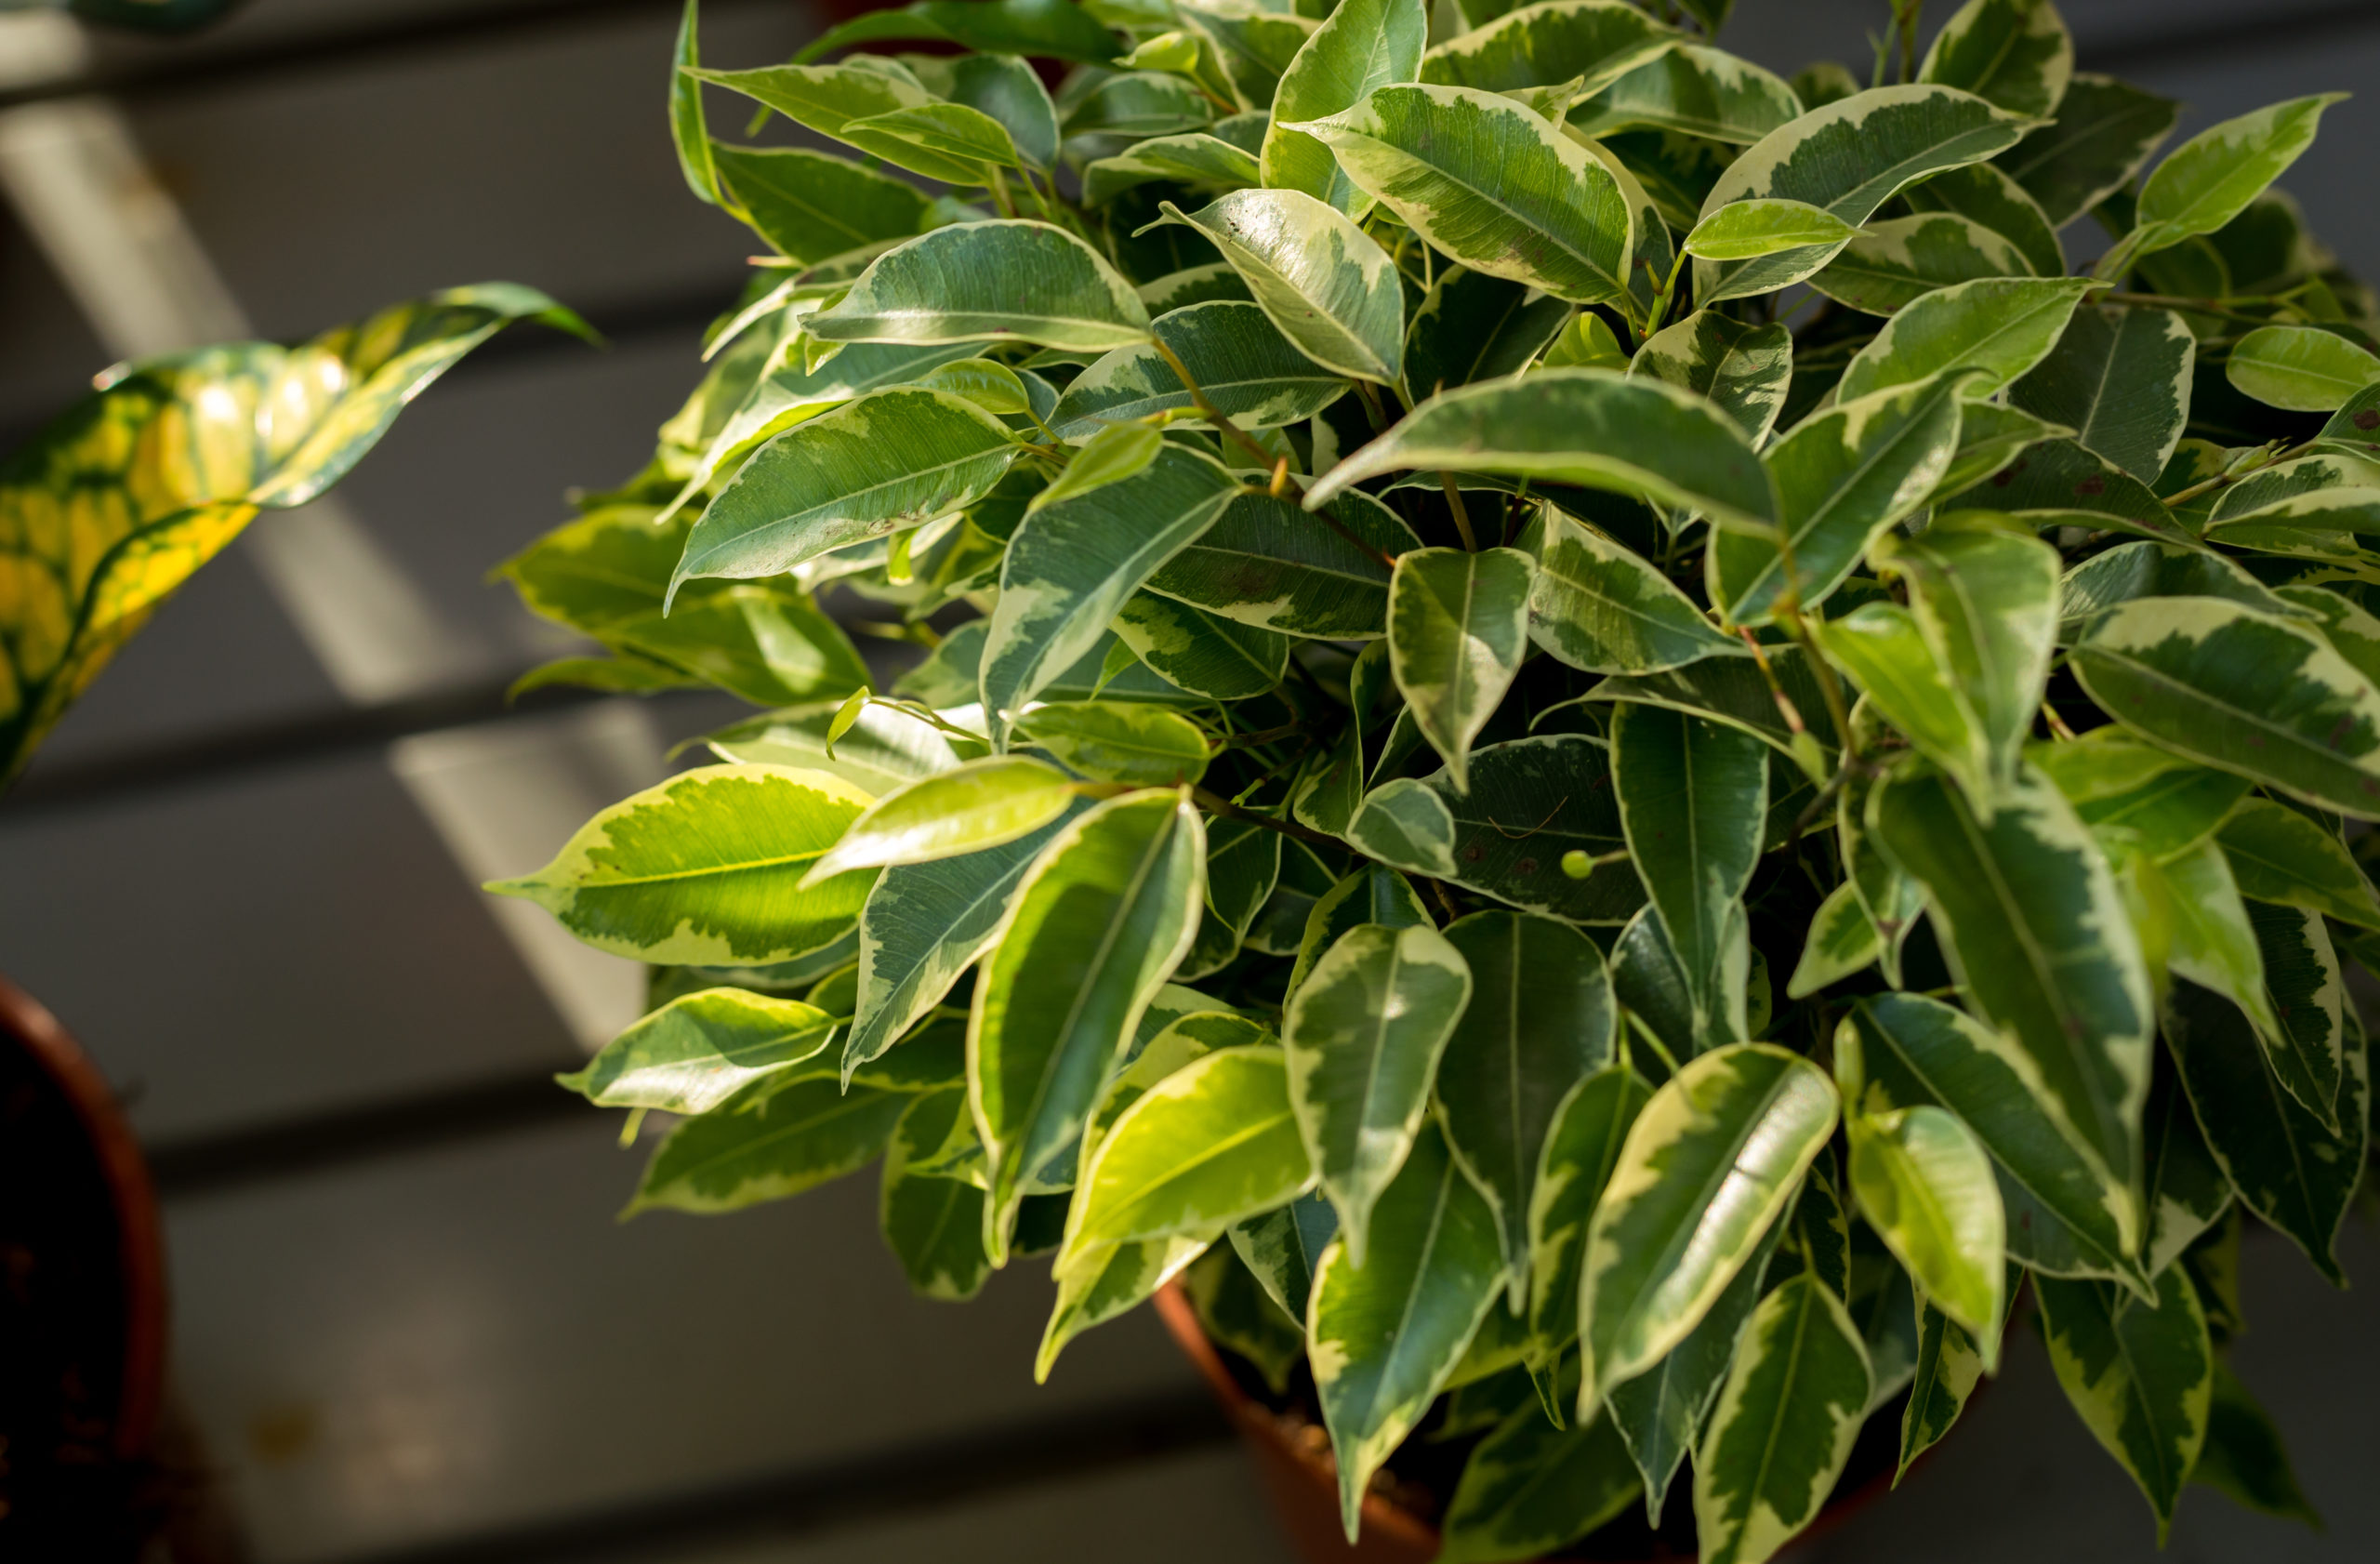
If you’re like most people, you spend a significant amount of time in your office each work week. Whether you’re typing away at a computer or attending meetings, your workspace is a place where you need to be productive, focused, and motivated. One way to enhance your office environment and improve your mood is by bringing in plants. However, as many office workers have experienced, keeping plants alive and healthy in an office setting can be a challenge. Let’s explore the reasons why office plants fade and what you can do to prevent it from happening.

Overview

Often times when people think of an office plant, they conjure an image of a sad-looking potted plant sitting in the corner of a cubicle. But it doesn’t have to be that way. With a little bit of knowledge and effort, you can create a thriving indoor garden that enhances your workspace. And improves your quality of life. Whether you’re a seasoned plant parent or just starting out, a little bit of knowledge will help you keep your office plants healthy, vibrant, and beautiful.

Understanding more about the common reasons why office plants fade, including too little or too much light, improper watering, poor soil quality, and knowing how to care for your plants to ensure they stay healthy and vibrant will help you and your plant stay happy and healthy in the office, creating a beautiful and productive workspace that’s filled with the benefits of living plants.

So, whether you’re looking to add some greenery to your cubicle or want to create a lush indoor garden in your office, read on to discover why office plants fade and how you can prevent it from happening.

Top 10 Reasons Why Plants Fade

It’s not uncommon for workspaces to be stressful and tense at times.  Work can be hard and keeping worker motivation and productivity levels high can be difficult.  One proven way to keep things calm and workers more motivated is by including plants in the office.  But those plants need to remain vibrant and healthy.  Workers aren’t motivated by sad, wilting plants that lack the vibrance necessary to keep things zen.  Check out the top 10 reasons why plants fade:

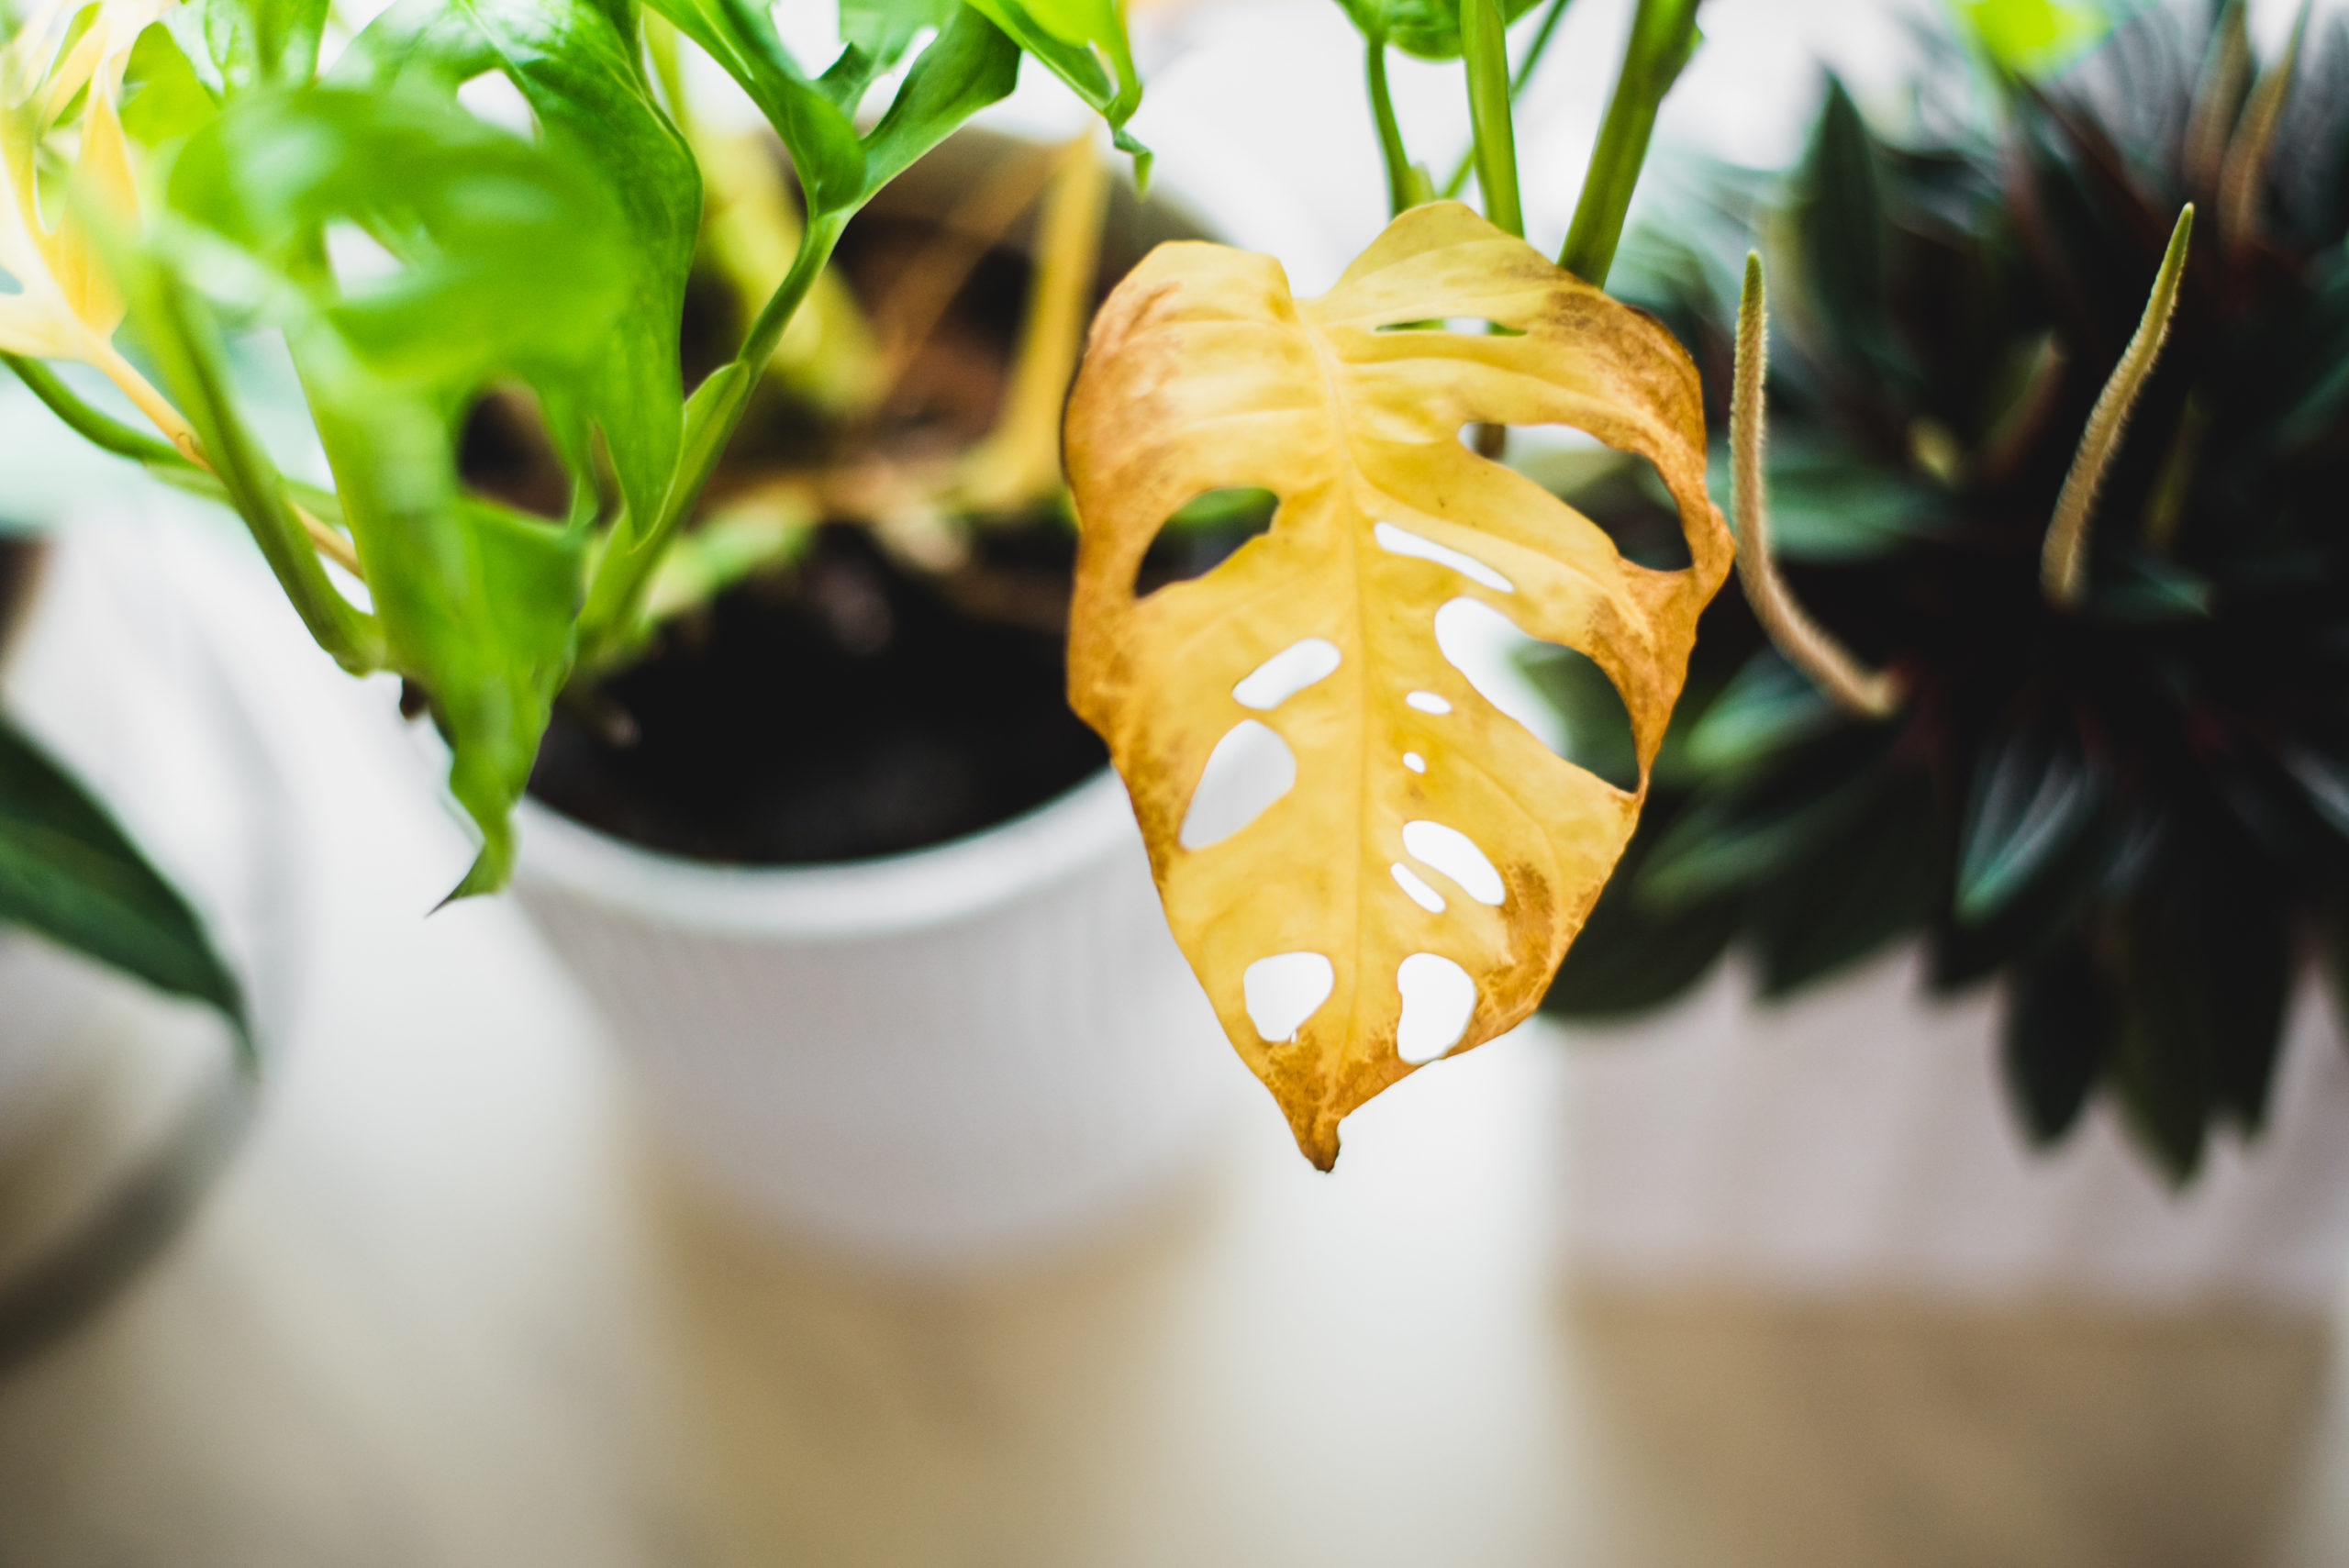
  1. Lack of Light: Plants need light to grow, and if they don’t get enough light, they will start to fade. This is especially true for office plants that may be situated far away from windows or in areas with artificial lighting that doesn’t provide enough intensity or duration. Symptoms of a lack of light include small, pale leaves, stunted growth, and stems and leaves leaning towards the source of light.

To prevent plants from fading due to a lack of light, try moving them closer to a bright window or providing additional artificial light sources, such as grow lights. If you’re unsure how much light your plant needs, do a little research on the specific plant and adjust the lighting accordingly.

  1. Too much light: Because everything needs balance, just as a lack of light can harm your plants, too much light can also be detrimental. Plants that are exposed to too much direct sunlight can experience sunburn. Which causes the leaves to turn crispy and brown and may lead to leaf drop. Some plants can also become dehydrated if they’re exposed to too much light, which can cause their leaves to wilt.

To prevent plants from fading due to too much light, try moving them away from direct sunlight or providing shade. You can also use a sheer curtain to filter the light and reduce its intensity.

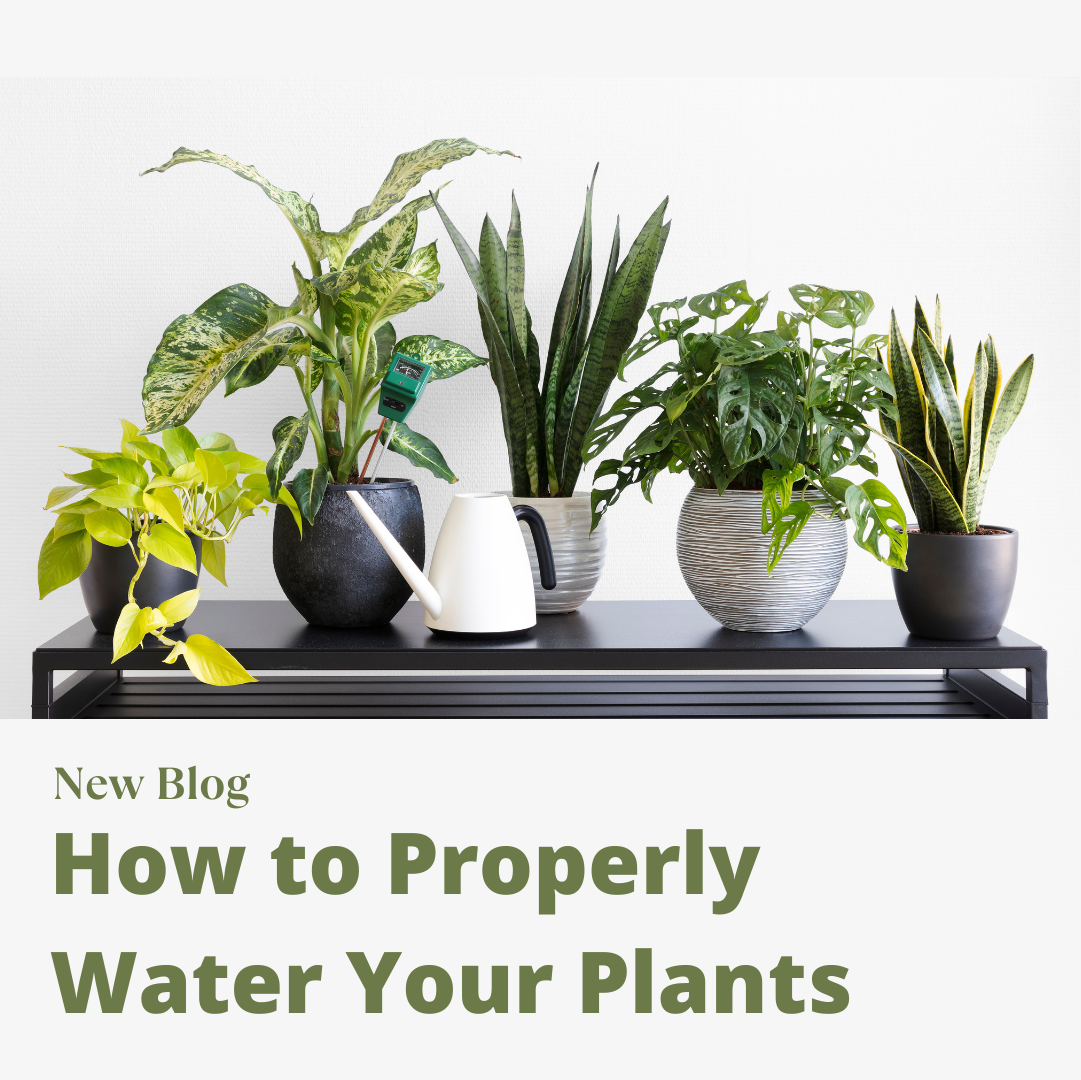
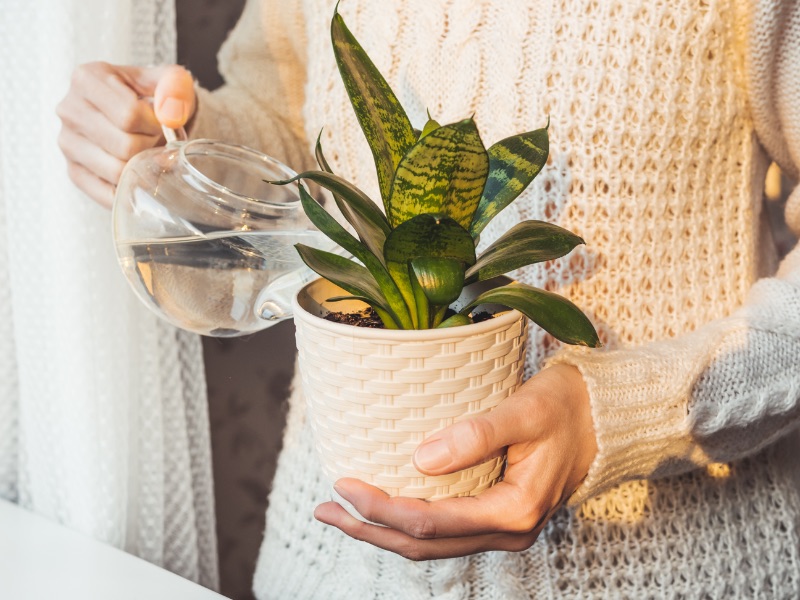
  1. Lack of water: Plants need water to survive, and if they don’t get enough, they’ll start to fade. Symptoms of a lack of water include wilted leaves, yellowing or browning of leaves, and stunted growth.

In order to prevent plants from fading due to a lack of water, make sure to water them regularly and consistently. Pay attention to the specific water needs of each plant and adjust accordingly. Some plants may need more water than others, and factors such as temperature and humidity can also affect their water requirements.

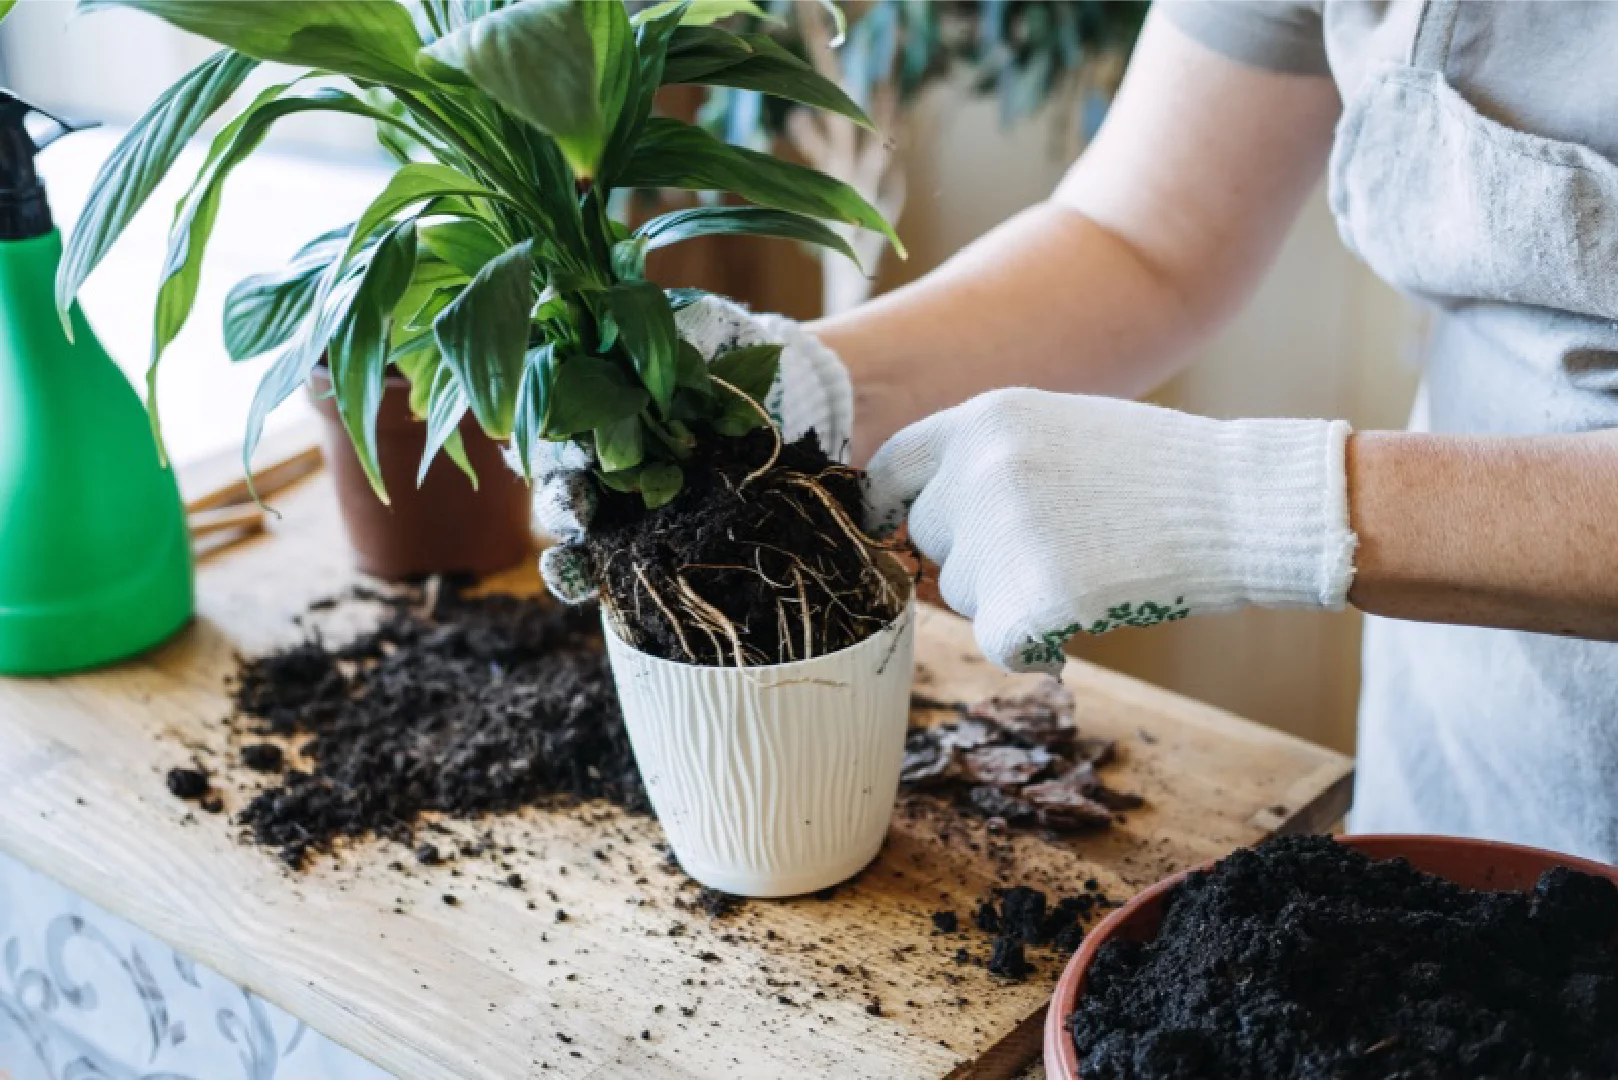
  1. Too much water or poor drainage: While plants need water to survive, too much water can be just as harmful as too little. Overwatering or poor drainage can lead to root rot, which will cause the plant to wilt and fade. Symptoms of overwatering or poor drainage include yellowing leaves, soggy soil, and a foul smell.

Prevent plants from fading due to overwatering or poor drainage by making sure to only water them when the soil is dry to the touch. Avoid leaving plants in standing water or using pots without drainage holes. If you’re unsure about the drainage quality of your potting soil, consider using a soil mix specifically designed for indoor plants that may contain special mediums for moisture control.

  1. Too much heat: Plants can be sensitive to high temperatures, especially those that are situated in direct sunlight or near heat sources such as radiators or heating vents. Symptoms of too much heat include wilted leaves, brown or scorched patches on leaves and will drop.

To limit fading due to too much heat, try moving them away from direct sunlight or heat sources. You can also use a fan or air conditioning to cool the surrounding area and provide better air circulation.

  1. Drop in temperature: Just as high temperatures can harm plants, a sudden drop in temperature may also cause them to fade. This is especially true for plants that are sensitive to cold or frost, such as tropical plants. Symptoms of a drop in temperature include wilting, leaf drop, and discoloration.

Limit fading due to a drop in temperature by keeping plants in a location with stable temperatures. Avoid placing plants near drafty windows or doors and consider using a space heater or insulation to keep the surrounding area warm.

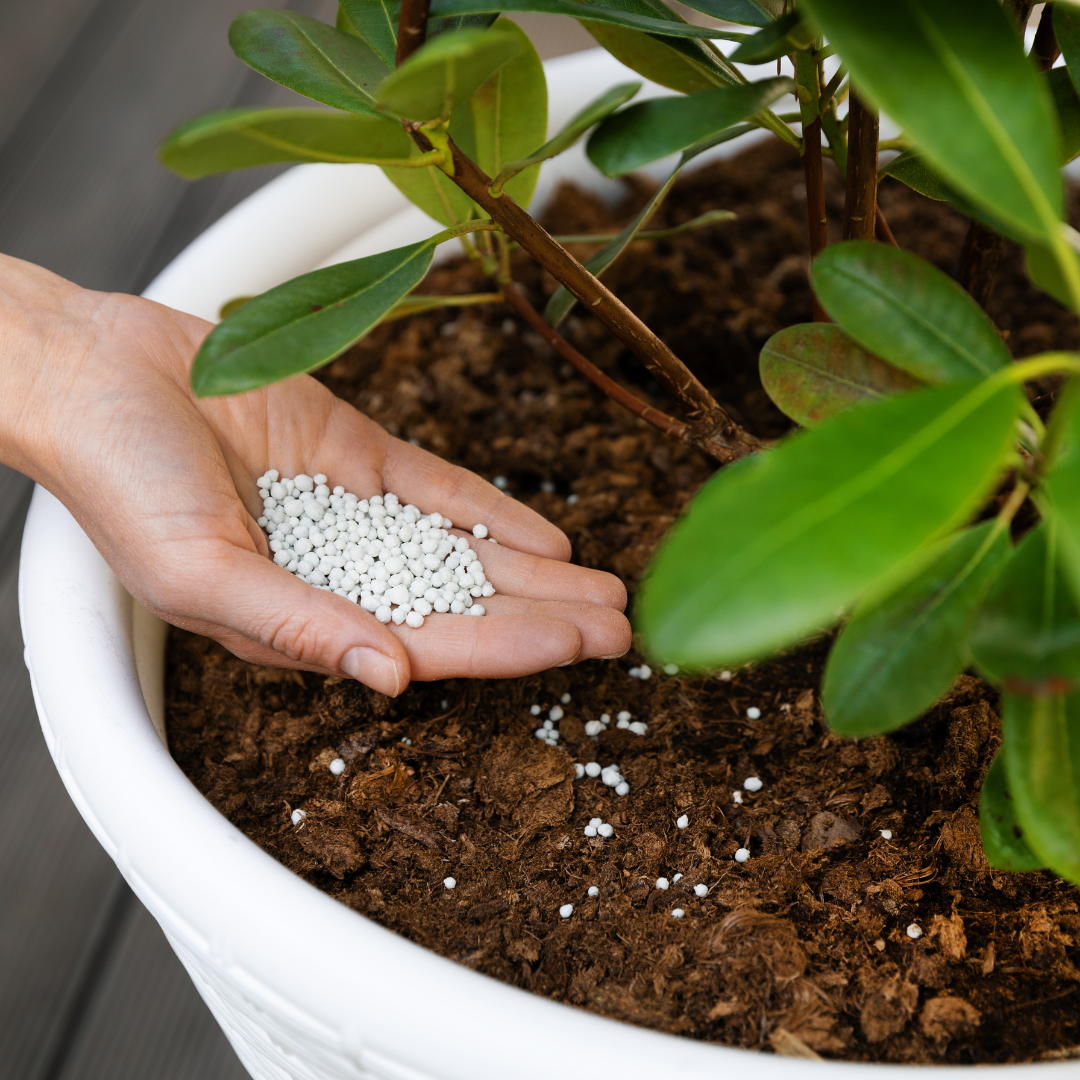
  1. Lack of fertilizer: Plants need nutrients to grow and thrive, and if they don’t get enough of these nutrients, they may start to fade. Symptoms of a lack of fertilizer include stunted growth, yellowing leaves, and a lack of flowers or fruit.

To ensure your plant is receiving enough nutrients, consider fertilizing it with a plant-specific fertilizer every few weeks. Be sure to follow the instructions on the fertilizer package and avoid over-fertilizing, which can be just as harmful as under-fertilizing.

  1. Too much fertilizer: While a lack of fertilizer can cause fading, too much fertilizer is also a problem. Over-fertilizing may burn the roots of the plant and cause the leaves to turn brown and fall off.

To avoid over-fertilizing, be sure to follow the instructions on the fertilizer package. And avoid applying too much fertilizer at once. Additionally, consider using a slow-release fertilizer, which releases nutrients over a longer period of time.

  1. Salts accumulating in potting soil because of alkaline water: When you water your plants, the water evaporates, but the minerals in it don’t. Over time, these minerals build up in the soil and become toxic to your plants. If you live in an area with hard water, high in minerals like calcium, magnesium, and sodium, you may notice a white crust on the surface of the soil. This is a sign that salts are accumulating.

The accumulation of salts in the soil can cause the roots of your plants to dry out and die, leading to faded and yellowing leaves. If you suspect that your plants are suffering from an accumulation of salts, you can flush the soil by watering your plants heavily. You can also use distilled water or rainwater to prevent the buildup of salts in the soil.  If you opt to use tap water, let the water sit for 24 hours before watering to allow the minerals to settle.

  1. Lack of humidity: Plants need a certain amount of humidity to thrive. If the air in your office is dry, it can cause the leaves of your plants to dry out and fade. This is especially true in the winter when the air tends to be drier.

To increase the humidity around your plants, you can use a humidifier or place a tray of water near your plants. You can also group your plants together to create a microclimate that is more humid. Misting plants regularly and ensuring they are places away from heat sources will help improve humidity for your plants.

Paying attention to your plants and catching the problems before they cause significant damage to your office plants will make sure the plants recover quickly and provide clean, fresh air and stress-free vibes for your office workers.

Conclusion

Faded and dying plants can make an office feel lifeless and dreary. However, it is important to understand that fading is a natural process that occurs when the plant is not receiving the optimal conditions it needs to thrive. But the good news is that with a little care and attention, you can keep your office plants healthy and vibrant.

First, it is essential to provide adequate lighting for office plants. As mentioned earlier, plants need a specific amount of light to survive. And too much or too little can be detrimental. It is recommended to place the plant in a location that receives bright but indirect sunlight. And to rotate it periodically to ensure even exposure.

Second, proper watering is crucial to prevent fading. Overwatering or underwatering can both lead to fading, and it is essential to find the right balance. Office plants should be watered when the top inch of soil feels dry to the touch. And the water should be allowed to drain out of the pot completely. So as to prevent the roots from sitting in standing water.

Third, it is important to provide proper drainage for office plants. Poor drainage can cause water to accumulate in the soil, leading to root rot and ultimately fading. Make sure the pot has drainage holes and that excess water is drained away from the plant.

Fourth, maintaining an optimal temperature for the plant can prevent fading. Many office plants are sensitive to extreme temperatures and prefer a temperature range of 60-75 degrees Fahrenheit. It is important to avoid placing plants near heating or cooling vents or drafty areas.

Fifth, providing the right amount of fertilizer can also help prevent fading. Plants require nutrients to grow and thrive, and a lack of fertilizer can cause fading. However, it is important not to over-fertilize, as this can lead to nutrient burn and ultimately fading. Follow the instructions on the fertilizer package and only apply as recommended.

Sixth, using alkaline water can cause salts to accumulate in the potting soil, leading to fading. To prevent this, use distilled water or collect rainwater for your plants.

Finally, maintaining proper humidity levels can also help prevent fading. Many office environments have low humidity levels, which can cause the leaves to dry out and fade. Consider using a humidifier or placing a tray of water near the plant to increase humidity levels.

Office plants provide a plethora of benefits, from improving air quality to reducing stress levels. However, to enjoy these benefits, it is important to provide the proper conditions for your plants to thrive. By understanding the common causes of fading and taking steps to prevent it, you can ensure that your office plants stay healthy and vibrant for years to come. Remember, proper lighting, watering, drainage, temperature, fertilization, water quality, and humidity are all important factors to consider when caring for your office plants.

Of course, if the maintenance and care for office plants seems overwhelming, hire a top-notch plant service to take that stress off of your plate.  PLANTZ will work with you to design the right mix of plants and planters that will thrive in your office environment. Allowing you and your workers to connect with nature while remaining productive.  Our green teams work with a wide range of plants to ensure the right plants are in the right space.  Even better, the PLANTZ team will maintain and care for your office plants. Letting you reap the benefits of indoor plants with none of the work.

If you’re tired of watching your office plants wither and fade away, don’t give up! Simply, let PLANTZ do the work for you.  Don’t let another leaf drop. Head over to Plantz.com and see what our green team can do for your office space!

F.A.Q.’s

1. How often should I water my office plants?

A: The necessary watering frequency for office plants varies depending on the type of plant. And the amount of light and humidity it receives. In general, it’s best to let the top inch of soil dry out before watering again. However, some plants like succulents or cacti can go weeks without watering. While others like ferns or peace lilies need to be watered more frequently.

2. Can I place my office plants near a window with direct sunlight?

 A: While some office plants require direct sunlight, others can be harmed by too much sun exposure. If your office has a lot of natural light, it’s best to place your plants a few feet away from the window to avoid direct sun exposure. Alternatively, you can use sheer curtains or blinds to filter the sunlight.

3. How do I know if my office plant is getting enough humidity?

 A: Office environments can be very dry due to air conditioning and heating systems. You can tell if your plants need more humidity if their leaves start to turn brown or crisp at the edges. To increase humidity, you can place a tray of water near your plants or invest in a humidifier.  Also ensure your plants are out of the direct path of vents.

4. Should I fertilize my office plants?

 A: Yes, fertilizing your office plants can help promote growth and prevent fading. However, it’s important not to over-fertilize, as this can also harm your plants. It’s best to follow the instructions on the fertilizer package and only fertilize during the plant’s active growing season.

5. How do I prevent pests from damaging my office plants?

A: Pests like spider mites, mealybugs, and scale insects can damage your office plants and cause them to fade. To prevent pests, make sure to regularly inspect your plants for signs of infestation. And treat them as soon as possible. You can also use natural pest control methods like neem oil or insecticidal soap.

Thrips

Hi, PLANTZ family!  Today we are going to bug out on thrips.  Thrips are tiny pests that can cause big problems for your office plants.  If you’ve noticed small, slender insects on your plants that seem to be damaging their leaves, you may have a thrips infestation.  But don’t fret, we’re here to help!

What are thrips?

So, what exactly is a thrip? Thrips are tiny insects that measure less than 1/8 inch in length and can range in color from yellow to black. They are attracted to new growth and can be found on the undersides of leaves, as well as on flowers and buds. They are known for their ability to cause extensive damage to a wide range of plant species, including office plants. If left untreated, thrips can lead to stunted growth, leaf distortion, and even death in severe infestations.

Thrips reproduce quickly, and their populations will explode if not controlled. They lay their eggs on the surface of leaves, and the larvae emerge to feed on the plant sap. As they mature, thrips molt and shed their skin, leaving behind tiny white or silver excrement particles on the plant surface.

Thrips can be challenging to control, as they are resistant to many conventional insecticides. However, there are a variety of methods for controlling thrips and preventing them from damaging your office plants. Regular monitoring of your plants for signs of infestation, such as small, discolored spots on leaves, can help to catch thrips early and prevent them from causing significant damage.

Maintaining a healthy growing environment for your office plants can also help to prevent thrips infestations. Thrips are attracted to stressed plants. So it’s important to ensure that your plants are receiving proper light, water, and nutrients. Removing any damaged or infected plant material can also help to prevent thrips from spreading.

If you do discover a thrips infestation on your office plants, there are a variety of control methods you can try. Insecticidal soaps and oils can be effective in killing thrips but be sure to follow the instructions carefully to avoid damaging your plants. Additionally, introducing natural predators such as ladybugs and lacewings can help to control thrips populations. But they may not be the right solution for an office space.

Generally, thrips are a common plant pest that can cause significant damage to office plants if left untreated. By regularly monitoring your plants for signs of infestation and maintaining a healthy growing environment, you can prevent thrips from taking hold. And if you do discover a thrips infestation, there are a variety of control methods you can try to keep your plants looking their best.

What do thrips look like?

Think you might have a thrip infestation?  Let’s discuss what these little buggers look like to help you determine if the thrip is the cause of your plants stress.

As we discussed, thrips are tiny insects that are less than 1/8 inch in length and range in color from yellow to black. They have narrow, elongated bodies and two pairs of feather-like wings that are fringed with hairs. These wings give thrips a distinctive, almost “fuzzy” appearance when viewed up close.  They can fly, but are not the best at it. So you won’t see them buzzing around your plants like a fungus gnat.

While thrips can vary in color, they are typically very small and difficult to spot with the naked eye. However, if you inspect your office plants closely, you may be able to see them moving about on the undersides of leaves or in the folds of new growth. Thrips are often attracted to new growth and can be found feeding on leaves, flowers, and buds.

One of the most notable characteristics of thrips is their piercing-sucking mouthparts, which they use to feed on the sap of plants. This causes significant damage to office plants over time, leading to stunted growth, leaf distortion, and may even kill your plant.

In addition to their small size and distinctive wings, thrips can also leave behind telltale signs of their presence. As they feed on plant sap, they can cause small, discolored spots on leaves and flowers. These spots may be accompanied by silver or white excrement particles left behind by the thrips as they shed their skin and mature.

While thrips can be challenging to spot and identify, it’s important to be vigilant when it comes to monitoring your office plants for signs of infestation. Catching thrips early can prevent them from causing significant damage and can make it easier to control their populations.

Thrips Life Cycle

Have you ever wondered how thrips, those pesky plant pests, reproduce and grow their populations? Understanding the thrip life cycle can help you better control their presence on your office plants.

Thrips go through a gradual metamorphosis, meaning they develop through three distinct life stages: egg, nymph, and adult. The length of each stage can vary depending on environmental factors such as temperature and humidity.

The first stage of the thrip life cycle is the egg stage. Female thrips lay their eggs on or within plant tissue, often in the crevices of leaves or buds. The eggs are usually oval-shaped and less than 1mm in size. The eggs then hatch into the second stage of the life cycle: the nymph stage.

Nymphs are wingless and resemble adult thrips but are smaller and lack fully developed reproductive organs. They feed on plant sap and molt several times as they grow and develop. The duration of the nymph stage can range from a few days to several weeks, depending on environmental conditions.

Once they reach maturity, thrips enter the third and final stage of their life cycle: the adult stage. Adult thrips have fully developed wings and reproductive organs and are capable of mating and laying eggs. Depending on the species, adult thrips can range in size from less than 1mm to over 2mm in length.

Adult female thrips lay their eggs on or within plant tissue, and the cycle begins again. The entire life cycle can take anywhere from a few weeks to several months, depending on environmental factors.

One interesting, and unfortunate for us plant lovers, characteristic of thrips is their ability to reproduce asexually. Female thrips can lay eggs without mating, which can lead to rapid population growth in favorable conditions.

Thrips can be challenging to control because of their rapid reproduction and development.  In the right circumstances, their development from egg to adult can take as little as two weeks!  This helps cause thrip populations to explode and can spell disaster for your office plants.

Understanding the thrip life cycle is an important step in controlling their presence on your office plants. By monitoring your plants for signs of infestation and using effective control methods, you can keep your plants healthy and thrip-free. Remember, prevention is key when it comes to managing thrips, so be sure to maintain a healthy growing environment for your office plants.

Thrips damage on houseplants

Thrips are not only a nuisance to humans but also a menace to plants. They are known to cause severe damage to crops and garden plants, including those found in offices and homes. These tiny, slender insects pierce the leaves, stems, and flowers of your indoor plants, leaving behind scars that may take a long time to heal.

One of the most noticeable signs of thrip damage is the presence of pierced holes on the leaves of your houseplants. These tiny holes are caused by thrips using their mouths to pierce the surface of the leaves and sucking out the sap and juices of the plant. Thrips feed by scraping the surface of the leaf and then inserting their long, slender mouthparts into the hole they created. They then suck the sap and nutrients out of the plant, leaving behind a damaged and weakened plant.

As thrips feed on your office plants, they also secrete a toxic substance that can lead to the death of the affected tissue, like a plant necrosis. This can cause the leaves to turn yellow, dry out and eventually fall off. If left unchecked, thrip infestations will cause a significant reduction in plant growth and even death in severe cases.

In addition to pierced holes, thrip damage may also manifest in other ways. For instance, thrips can cause the leaves of your plants to curl or deform, a condition known as leaf curl. This happens when thrips feed on the growing tips of the leaves, which can lead to stunted growth and twisted or curled leaves.

Another way that thrips can damage your houseplants is through the spread of plant diseases. Thrips can carry and transmit viruses and bacteria to plants, leading to the development of diseases that can be fatal to your plants. These diseases can cause symptoms such as yellowing, stunting, and necrosis of the plant tissues.

Thrips damage can also weaken your indoor plants, making them more susceptible to other pests and diseases. Weakened plants may be less able to fight off infections and infestations, leading to further damage and loss of plant health.

Thrips cause significant damage to your houseplants by piercing holes into the leaves and sucking out the sap and juices. They can also cause leaf curl, spread plant diseases, and weaken your plants, making them more vulnerable to other pests and diseases. Therefore, it is important to take preventive measures such as regularly inspecting your plants for thrip infestations, keeping your plants healthy and well-watered, and using natural pest control methods such as sticky traps and beneficial insects to control thrips and other pests.

How to get rid of thrips on office plants

Dealing with thrips on office plants can be a challenge. But it’s important to take action to prevent these pests from causing damage to your plants and spreading to your other plants. Luckily, there are several ways to get rid of thrips on houseplants, and with a bit of effort, you can get your plants looking healthy and beautiful again.

Here are some effective ways to get rid of thrips on office plants:

  • Remove heavily infested leaves/flowers: Start by pruning or picking off the heavily infested leaves or flowers of your plant. This reduces the number of thrips on your plant and prevents them from spreading further. Remember to dispose of the removed parts in a sealed plastic bag to prevent any thrips from escaping and reinfesting your plant.
  • Wash down your plant: Using a strong stream of water from a hose, gently wash down your plant’s leaves, stems, and other parts to remove any remaining thrips. This also helps to dislodge thrips’ eggs and reduces the likelihood of a reinfestation. You can repeat this process every few days, depending on the severity of the infestation.
  • Spray with insecticidal soap: Insecticidal soaps are effective against thrips and other pests, and they are safe for most plants. You can purchase an insecticidal soap at your local garden center or make one at home using natural ingredients. To apply, follow the instructions on the label, and ensure that you cover all parts of the plant, especially the undersides of the leaves where thrips often hide.
  • Apply a systemic insecticide: Systemic insecticides are absorbed by plants and transported throughout the plant’s tissues, making them ideal for controlling pests like thrips that feed on the plant’s sap. These insecticides come in granular or liquid forms and are available at garden centers. Follow the manufacturer’s instructions and ensure that you apply the insecticide during the plant’s active growth phase.
  • Use a sticky trap to capture adult thrips: Sticky traps are an excellent way to monitor thrips populations and to capture adult thrips. You can purchase sticky traps at garden centers or make your own using yellow or blue cardboard covered in petroleum jelly or another sticky substance. Place the traps around your plants, especially near the plant’s growing tips, and replace them regularly.
  • Repeat steps 2 and 3: Thrips are persistent little buggers. And it’s often necessary to repeat the control measures to get rid of them entirely. Keep an eye on your plant, and if you notice any new signs of infestation, repeat steps 2 and 3. Additionally, maintaining healthy growing conditions for your plants, such as appropriate watering, fertilization, and pruning, can help prevent thrips infestations in the future.

When dealing with thrips on office plants, it’s crucial to be persistent and patient. With consistent efforts, you can successfully get rid of thrips and prevent them from causing further damage to your plants.

How to prevent thrips

While controlling thrips can be difficult once an infestation has occurred, there are several preventative measures that can be taken to reduce the risk of thrips infestation. Let’s talk about several strategies for preventing thrips from damaging your plants.

  • Inspect New Plants: One of the easiest ways for thrips to enter your garden or home is through new plants. Before bringing any new plants into your home or garden, thoroughly inspect them for signs of thrips or other pests. Look for discolored leaves or flowers, distorted growth, and dark spots or blemishes. If you notice any signs of thrips, consider returning the plant or treating it before bringing it inside.
  • Keep Plants Healthy: Healthy plants are better able to resist thrips and other pests. To keep your plants healthy, make sure they are receiving adequate sunlight, water, and nutrients. Avoid over-fertilizing, which can weaken plants and make them more susceptible to thrips infestation. Regularly inspect your plants for signs of stress or disease and address any issues promptly.
  • Keep Garden Areas Clean: Thrips thrive in warm, humid environments. So keeping your garden area clean and free of debris can help prevent infestations. Remove any dead leaves or flowers from your plants, and keep the soil surface clean and free of weeds. Thrips can also hide in garden debris. So be sure to dispose of any fallen leaves, branches, or other plant debris.
  • Choose Resistant Varieties: Some plant varieties are naturally more resistant to thrips than others. When choosing plants for your garden or indoor space, consider selecting varieties that are known to be less susceptible to thrips infestation. The green team at PLANTZ can provide reliable advice on which varieties are best suited to your specific environment.
  • Repel Pests with Plants: Certain plants are known to repel pests, including thrips. Planting companion plants such as basil, oregano, and garlic can help deter thrips and other pests from attacking your plants. These plants contain natural chemicals that are toxic to thrips, making them an effective natural pest control solution.  Not only will they help resolve your thrips problem, but they will leave your office smelling delicious and your coworkers craving spaghetti marinara.
  • Don’t Overfertilize: Overfertilizing your plants can make them more attractive to thrips and other pests. When plants receive too much nitrogen, they produce softer, more succulent growth, which is more appealing to thrips. Instead, follow a regular fertilization schedule and avoid excessive use of nitrogen-rich fertilizers.  Also, read the labels on the fertilizer and follow the instructions precisely.
  • Treat Bulbs: Thrips are known to infest bulbs, particularly gladiolus bulbs. Before planting bulbs, soak them in a solution of 1 tablespoon of Lysol per 1 gallon of water.  They should soak for several hours and need to be planted while the bulbs are damp.  Thrips problems can also be resolved by “overwintering” bulbs at temperatures of 35°-40°F for several months. Just make sure the bulbs don’t actually freeze.

Preventing thrips from damaging your plants requires a multi-faceted approach that includes regular inspection, proper plant care, and the use of natural pest control methods. By following the tips outlined in this article, you can reduce the risk of thrips infestation. And keep your office plants healthy and thriving.

Summary

Taking care of your plants and protecting them from thrips is an essential aspect of keeping your indoor office plants healthy and thriving. With proper care and prevention techniques, you can keep pesky thrips at bay and ensure your plants remain in good health.

It’s crucial to inspect new plants before bringing them into your office space to ensure they are free from any infestations. Keeping your plants healthy and well-nourished is another key aspect of thrips prevention. As they often target weaker or stressed plants. Regular watering, proper fertilizing, and providing sufficient lighting and humidity levels all contribute to maintaining plant health.

Keeping plant areas clean and free of organic debris will also help reduce the likelihood of thrip infestations. Choosing plant varieties that are naturally resistant to thrips and other pests can be another effective prevention method. Additionally, planting pest-repelling plants such as lavender, marigold, and garlic can help deter thrips from your garden space.

It’s also essential to avoid over-fertilizing your plants, as this can make them more susceptible to pest infestations. And if you’re planting bulbs, treating them with dose of watered-down Lysol before planting can help protect them from thrips and other pests.

By following these prevention and care techniques, you can keep thrips and other pests at bay. And ensure your office plants remain healthy and vibrant. And if you do encounter a thrip infestation, remember to act quickly and take appropriate measures to prevent further damage to your plants.

If you’re dealing with thrips on your office plants, don’t hesitate to reach out to PLANTZ for expert guidance and advice. Our team of plant care specialists can help you identify the presence of thrips, provide you with solutions to get rid of them, and give you tips on how to prevent them from coming back. We offer a variety of plant care services, including plant consultations, fertilization, pruning, and pest control. Contact us today to schedule a consultation and let us help you keep your office plants healthy and beautiful. Together, we can create a thriving and inviting workspace for you and your team.

F.A.Q.’s

1. How do I know if my office plant has thrips?

Look for signs such as silvery or bronze-colored speckling on leaves, black fecal droppings, and distorted leaves or flowers.

2. Can thrips harm humans?

Thrips do not harm humans, but they can damage plants and reduce their overall health.

3. Can thrips spread to other plants?

Yes, thrips can easily move from one plant to another. So it’s important to isolate infected plants and take steps to prevent further spread.

4. Can I use natural methods to control thrips on my office plants?

Yes, there are several natural methods. Such as using sticky traps, spraying with neem oil or insecticidal soap, and introducing predatory insects like ladybugs.

5. How often should I inspect my office plants for thrips?

It’s a good practice to inspect your office plants on a regular basis. At least once a week, to catch any potential infestations early on and prevent them from spreading.

Fertilizing 101: Essential Tips for Thriving Indoor Plants

Welcome to Plantz! In this blog post, we will delve into the world of fertilizing indoor plants and provide you with essential tips to ensure the health and vitality of your beloved plants. We will specifically focus on popular houseplants such as the Lisa Cane, Ficus Audrey, Dracaena Marginata, Rhapis Palm, Janet Craig, and Warneckii Lemon Lime. With the help of Plantz’s innovative products, including the Soil Sleuth, Preserved Mood Moss, Plant Assure Sub Irrigation System, Fiberex American Moss, and Foam Spacer, you’ll be equipped with everything you need to optimize your plant’s growth.

Understanding the Basics of Fertilization

Fertilizers play a crucial role in supplying essential nutrients to plants, promoting healthy growth, and preventing deficiencies. They generally consist of three main nutrients: nitrogen (N), phosphorus (P), and potassium (K), commonly known as NPK. Different plants have varying nutrient requirements, so it’s important to choose a fertilizer specifically formulated for your plant species.

  • Selecting the Right Fertilizer

When it comes to selecting the right fertilizer, consider the nutrient requirements of your plants. The Lisa Cane, Ficus Audrey, Dracaena Marginata, Rhapis Palm, Janet Craig, and Warneckii Lemon Lime generally thrive with a balanced, all-purpose fertilizer.

  • Timing Is Everything

Proper timing is essential for fertilizing your indoor plants. During the active growing season, which typically spans spring and summer, it’s best to fertilize every two to four weeks. Reduce the frequency to once every six to eight weeks during the dormant period in fall and winter.

  • Applying Fertilizer

Before applying any fertilizer, ensure the soil is slightly moist. Dilute the recommended amount of fertilizer in water according to the instructions on the product. Gently pour the mixture onto the soil, taking care to avoid the leaves. Overfertilizing can lead to salt buildup, causing root damage, so always follow the instructions provided.

Additional Plantz Products for Optimal Growth

  • Soil Sleuth: This handy tool available on Plantz.com helps you monitor moisture levels and nutrient deficiencies in your plant’s soil. It provides valuable insights, allowing you to adjust your fertilization routine accordingly.
  • Preserved Mood Moss: Enhance the aesthetics of your indoor plants while promoting moisture retention with preserved mood moss. This natural product is perfect for adding a touch of greenery to your potted plants.
  • Plant Assure Sub Irrigation System: For those seeking a low-maintenance watering solution, consider the Plant Assure Sub Irrigation System. It ensures consistent moisture levels, reducing the risk of over or under-watering your plants.
  • Fiberex American Moss: This organic, long-lasting moss is ideal for creating a humid microclimate around your plants. It helps retain moisture and provides a natural habitat for beneficial microorganisms. e. Foam Spacer: Achieve proper drainage and aeration in your potted plants with the Foam Spacer, which prevents soil compaction and promotes healthy root development.

Fertilizing your indoor plants is a vital aspect of plant care, and with the right knowledge and Plantz products at your disposal, you can ensure optimal growth and thriving greenery. Remember to choose the appropriate fertilizer for your plants, follow the recommended timing, and apply it with care. Explore Plantz.com to find the Soil Sleuth, Preserved Mood Moss, Plant Assure Sub Irrigation System, Fiberex American Moss, Foam Spacer, and more to further enhance your plant care routine. Happy fertilizing and enjoy the beauty of your indoor oasis!

How to Properly Water Your Plants

Are you a new plant parent trying to learn the ropes? Or maybe you’ve been around the block with a few plants and are convinced you have a black thumb. If you’re just starting out or want to become a better plant parent, one of the most important things you need to know is how to properly water your plants. Watering is a vital part of plant care. And it can be the difference between a thriving plant and a wilted one. In this blog post, we’ll cover everything you need to know about watering your plants. From the importance of proper watering to the best ways to water indoor and outdoor plants. So, grab your watering can and let’s go!

The Importance of Watering Your Plant Properly

Watering your plants properly is critical for their survival. Plants, like humans, need water to survive. But too much or too little water can be harmful to them, again just like humans. Overwatering can cause root rot, which can be deadly to your plants. On the other hand, underwatering can cause wilting, yellowing of leaves, and even death. Understanding your plants’ needs and ensuring you are using proper watering techniques is necessary to keep your plants healthy and happy.

One of the most important things to remember when watering your plants is that not all plants have the same needs. Some plants, such as succulents and cacti, require less water than other plants. Therefore, it’s crucial to understand your plant’s specific watering needs before you start trying to quench its thirst. Of course, there are tools that will help you take the guess work out watering your plants.  If learning how to tell naturally whether your plants are thirsty, never fear, PLANTZ’s Soil Sleuth is the perfect way to take the guesswork out of your plants’ thirst level.

The Best Ways to Properly Water Your Plant

Now that we know why proper watering is essential, let’s dive into the best ways to water your plants. The following are some of the best practices for watering your plants:

  • Water Where the Roots Are: When watering your plants, it’s essential to water where the roots are. Most plants have roots that are concentrated near the base of the plant, so it’s important to water there. Avoid watering the foliage, as this can lead to fungal diseases and other issues.
  • Check the Soil Before Watering: Before watering your plants, it’s essential to check the soil’s moisture level. Most people will tell you to stick your finger into the soil about an inch deep. If it’s dry, then it’s time to water. If it’s still moist, wait a few days before checking again. That process really isn’t that accurate and can lead to overwatering. Which can be just as harmful to your plants as underwatering.  This is where the Soil Sleuth becomes an essential tool.
  • Water in the Morning: Watering in the morning is the best time to water your plants. The temperature is cooler, and the soil has time to absorb the water before the sun comes up. Watering in the afternoon can lead to evaporation, and watering at night can lead to fungal growth.
  • Water Slowly: Water your plants slowly, allowing the water to soak into the soil. If you water too quickly, the water will run off and not penetrate the soil. Watering slowly also helps to avoid disturbing the soil and the plant’s roots.
  • Make Every Drop Count: Make every drop count when watering your plants. Don’t waste water by watering areas where it’s not needed. Instead, focus on watering the roots of the plant, where the water is needed most.
  • Don’t Overwater: Overwatering can be just as harmful as underwatering. Too much water can lead to root rot, which can be deadly to your plants. Remember to check the soil’s moisture level with a Soil Sleuth from PLANTZ before watering and only water when the soil is dry.
  • Don’t Let Them Go Dry: On the other hand, letting your plants go dry for too long can be harmful as well. It’s important to water your plants when they need it to keep them healthy and happy.  Again, not all plants need to be kept moist.  Make sure you learn your plants’ preferences before you opt to “forget about” your plant.
  • Use Mulch to Conserve Moisture: Using mulch around your plants can help to conserve moisture and prevent the soil from drying out too quickly. Mulch also helps to regulate the soil temperature, keeping it cool in the summer and warm in the winter.

The Dos and Don’ts of Watering Plants

Outdoor plants and indoor plants are not living the same lives.  Outdoor plants are constantly exposed to the elements, while indoor plants have access to temperature controls and artificial light.  Read on for some dos and don’ts of watering plants for both outdoor and indoor plants.

Outdoor Plants

  • DO hydrate plants in the Morning: As mentioned earlier, the best time to water outdoor plants is in the morning. Due to their exposure to the elements, watering in the morning allows the plants to soak up the water they need to get through the day.
  • DO water plants at soil level: When watering outdoor plants, water at soil level, right at the base of the plant. This ensures that the water soaks into the ground and goes directly to the roots and doesn’t just run off the surface of the soil.
  • DO water outdoor container plants at least once per day: Container plants need more frequent watering than plants in the ground, especially during hot weather. Water outdoor container plants at least once per day and check the soil often to ensure that it stays moist.
  • DO use a wand to water container plants: A wand is a great tool for watering container plants. It allows you to water at soil level, right at the base of the plant, and helps ensure that the water goes directly to the roots.
  • DO check the soil’s moisture level: Before watering outdoor plants, check the soil ‘s moisture level to ensure that you’re not over or underwatering. As we mentioned earlier, sticking your finger about an inch into the soil is not really an effective way to determine your plants moisture level. Using a Soil Sleuth is a simple and quite effective way to check the moisture level. By checking the soil’s moisture level regularly, you can adjust your watering schedule to meet your plants’ needs and promote healthy growth.
  • DON’T water too frequently – or not frequently enough: As we mentioned earlier, finding the right balance between watering too frequently and not frequently enough is crucial for plant health. Overwatering can lead to root rot and other fungal diseases, while underwatering can cause the plant to wilt and eventually die. Be sure to check the soil’s moisture level regularly and adjust your watering schedule accordingly.
  • DON’T use broadcast sprinklers: Broadcast sprinklers can be wasteful and inefficient when it comes to watering outdoor plants. They can also increase the risk of fungal growth and disease. As they water from above and can leave leaves and flowers damp. Instead, opt for a drip irrigation system or hand-watering with a watering can.
  • DON’T forget that trees need water, too: It’s easy to forget about watering trees, especially if they’re well-established, but they still need water to thrive. Young trees, in particular, need regular watering to help establish their root systems. When watering trees, it’s best to water slowly and deeply to encourage deep root growth.
  • DON’T water container plants with a jet-type spray nozzle: When watering outdoor container plants, it’s important to avoid using a jet-type spray nozzle.  These can be too forceful and can damage the plants. Instead, use a watering can or a hose with a gentle spray nozzle to avoid soil erosion and damage to the plants.
  • DON’T rely on rain: While rain can provide some water for outdoor plants, it’s not always reliable. Depending on your location and the time of year, you may experience droughts or periods of heavy rain. It’s essential to monitor your plants’ soil moisture level and supplement with watering as needed.

As you can see, proper watering is essential for the health and growth of outdoor plants. By following these dos and don’ts, you can help ensure that your plants thrive and flourish. Remember to check the soil’s moisture level regularly, water at soil level, and avoid over or underwatering. With a little attention and care, you can be a successful plant parent with a green thumb and enjoy a beautiful outdoor garden.

Indoor Plants

Indoor plants are different beasts.   Over or underwatering can cause a variety of problems. Including root rot, wilting, stunted growth, and may even create a happy habitat for pests. Let’s take a look at some dos and don’ts of watering indoor plants, so you can keep your green babies lush and happy.

  • DO use a watering can for houseplants: When it comes to watering indoor plants, a watering can is your best friend. It helps you to control the flow of water and target the soil without getting water all over your furniture and floors. It’s also more efficient than using a cup or glass to water your plants, which can be messy and time-consuming.
  • DO choose the right soil: Choosing the right soil medium is critical for the health of your indoor plants. A high-quality potting mix that’s designed for indoor plants will provide the nutrients and drainage they need to thrive. Avoid using soil from your garden or yard, as it can contain pests and diseases that can harm your plants.  Keep in mind that different plants flourish in different types of soil.  Standard indoor plant soil may not be right for succulents or cacti, while your popular aroids (for example, philodendron, aglaonema, and monstera) will benefit from a chunkier, well-draining soil.  Read up on your plants’ soil needs and pot accordingly.
  • DO invest in a soil moisture gauge: A soil moisture gauge, like the PLANTZ Soil Sleuth, is an inexpensive tool that can help you determine when your plants need watering. It measures the moisture level of the soil, so you can avoid over or underwatering. If you don’t have a soil moisture gauge, you can also stick your finger about an inch into the soil to check the moisture level, but this method is not advisable as it is rather inaccurate.
  • DO water less in winter and more in spring: The amount of water your indoor plants need depends on the time of year and the conditions in your home. In the winter, when the air is drier and cooler, plants typically require less water. In the spring and summer, however, plants get very thirsty!  When temperatures and humidity levels increase, plants will need more frequent watering. Keep an eye on your plants and adjust your watering schedule accordingly.
  • DO wick your plants while you’re away: If you’re going to be away from home for an extended period, wicking your plants can help ensure that they stay hydrated. To do this, fill a container with water and place it next to your plants. Then, insert a wick (such as a piece of cotton rope) into the container and drape the other end over the edge of the container and into the soil. The soil will absorb the water through the wick, keeping your plants hydrated while you’re away.  If this sounds too complicated for you, let PLANTZ do the system set up with their PlantAssure Sub-Irrigation System.
  • DON’T water houseplants with treated, softened water: Water that has been treated with a water softener or contains high levels of minerals (such as from a well) can be harmful to your indoor plants. These minerals can accumulate in the soil, causing root damage and nutrient imbalances. If you have no choice but to use softened or well water, consider investing in a reverse osmosis filter or use distilled water for your plants.
  • DON’T use a potting mix that’s too water-retentive: While it’s important to choose a potting mix that provides adequate drainage, using a mix that’s too water-retentive can lead to overwatering and root rot. Look for a potting mix that’s designed for indoor plants and provides a good balance of moisture retention and drainage.
  • DON’T put houseplants in pots that don’t have drainage holes: One of the most common mistakes new plant parents make is putting their indoor plants in pots that don’t have drainage holes. Without proper drainage, excess water can accumulate in the soil, leading to root rot and other problems. Always choose pots with drainage holes or drill your own if necessary.
  • DON’T forget to dump the water collection tray: When you water your indoor plants, excess water will drain into the collection tray underneath the pot. It’s essential to dump this water regularly, as it can become stagnant and create a breeding ground for pests and diseases. If left unattended, it can also cause the soil to become waterlogged, leading to root rot. So be sure to check the collection tray after watering and dump any excess water.
  • DON’T overwater: Perhaps the most crucial rule of watering indoor plants is not to overwater them. Overwatering can lead to root rot, which can be devastating to your plant (and to you!) and is difficult to reverse. Remember, it’s better to underwater than overwater your plants. If you’re unsure whether your plant needs water, use a soil moisture gauge like the Soil Sleuth to check the moisture level.

By using these dos and don’ts as a guide, you can ensure that your indoor green babies receive the right amount of water and stay happy and healthy. As with outdoor plants, remember to choose the right soil, invest in a soil moisture gauge, and use a watering can for precise watering. And most importantly, don’t overwater your plants! With a little bit of love and attention, you can enjoy thriving, beautiful indoor plants for years to come.

Conclusion

Remember, watering plants is not a one size fits all scenario.  Different plants use water at different rates. And it is important to be aware of how to properly water your plant.  Our guide on the best ways to water your plants and the dos and don’ts for both indoor and outdoor plants are there to help you get your feet under you and ensure your plants remain lush and lively.  If trying to keep tabs on your plants’ watering schedule is causing you to feel overwhelmed, invest in the Soil Sleuth and the PlantAssure Sub-Irrigation System from PLANTZ to take the guesswork out of watering your plants.

At PLANTZ, the mantra we believe in goes something like this:

Wet it. Let it dry down.

Wet it. Let it dry down.

Wet it. Let it dry down.

Wet it. Let it dry down.

We know this will work for you.

Are you ready to take the first step and become a plant parent?  Check out the shop at PLANTZ and find the right plant for you!  They offer a wide variety of plants at different sizes and have planters to go along with them.  Choose the one that will work best in your available space.  Shop online with PLANTZ today and Invest in a new plant best friend!

Bottom of Form

If you’re a new plant parent, it’s normal to have questions and concerns about watering your plants. That’s why we’ve compiled a list of frequently asked questions to help address some of the most common issues and provide you with additional information.

F.A.Q.s  –

  1. How often should I water my plants?

The frequency of watering will depend on the plant’s specific needs and environmental conditions. Some plants require more water than others, while others prefer to be on the drier side. As a general rule, you should wait until the soil is dry to the touch before watering your plant. Or better yet, get a more accurate reading by using a Soil Sleuth to help you determine if your plant is thirsty.

  1. Should I use tap water or filtered water for my plants?

Tap water is usually fine for most plants. But some may be sensitive to the chemicals and minerals present in tap water. If you’re concerned about the quality of your tap water, you can use filtered or distilled water instead.

  1. Can I water my plants with ice cubes?

While it may seem like a convenient way to water your plants, using ice cubes can actually be harmful. The cold temperature can shock the plant’s roots and cause damage. It’s best to use room temperature water instead.

  1. Is it better to water plants from the top or bottom?

It’s generally better to water plants from the bottom, as this allows the roots to absorb the water directly. However, some plants may benefit from overhead watering, especially those that require high humidity levels.

  1. Can I overwater my plants by using a self-watering system?

Self-watering systems can be a convenient way to water your plants, but it’s still possible to overwater them. Be sure to check the soil’s moisture level regularly and adjust the watering frequency as needed.  One way to ensure your plants are always getting the water they need when they need it without being overwatered is with the PLANTZ PlantAssure Sub-Irrigation System.

Where Has All the Soil Gone?

Hello, plant parents!  It’s no secret that we love our green (and pink, and purple, and yellow, and really the entire rainbow) plant friends and want to make sure they have a happy and healthy place to call home.  Sun and water are not the only things plants need to thrive.  They also need nutrients which they get from soil.

The Dirt-y Truth

As plant parents, we know that soil is the foundation for healthy and flourishing plants.  It provides essential nutrients and a stable environment for our leafy friends to grow.  However, have you ever wondered why all the soil seems to disappear and your plants need to be topped off with new soil?  Where has it all gone?

In order to answer that question, we need to understand a little about soil and its importance to plant health.  Soil is a mixture of organic and inorganic materials, including a variety of minerals, water, air, bacteria and fungi.  It’s the primary medium that plants rely on for strength, water, and food.

Soil nutrient loss is a gradual process that occurs when essential minerals are removed from the soil.  This happens due to natural processes like erosion or leaching or even human activities like monocropping or continuous cropping.  The problem with nutrient loss is that it results in nutrient deficient soil. Which hurts a plants’ growth and leads to soil degradation.

How Does Soil Lose Its Nutrients?

By understanding how soil loses its nutrients, we can take steps to prevent it. And maintain healthy soil for our plant babies.  So, what are some of the leading causes of nutrient depletion in soil?

  1. Leaching – The Culprit of Nutrient Loss: Leaching is a natural process where nutrients in the soil are carried away by water. This happens when water moves through the soil and takes nutrients with it. Rain, irrigation, and other types of water application techniques all contribute to the leaching process. Although it’s a natural process, over-irrigation can exacerbate the problem. When too much water is applied, the excess water will leach out the nutrients that plants need, leaving the soil nutrient depleted.
  2. Soil Erosion – A Slow but Steady Killer: Soil erosion is the natural process of soil being moved or carried away by wind or water. While this can happen naturally, it can also be accelerated by farming practices like plowing and tilling. When topsoil is removed, the nutrients that were once present in that soil go with it. Soil erosion can be a slow but steady killer of soil fertility. And it can take years or even decades for the effects to become apparent. But it does happen, and plant parents need to be aware of it.
  3. Monocropping – The Practice of Growing the Same Crop: Monocropping is the practice of growing the same crop in the same field year after year. This depletes the soil of certain specific nutrients, such as nitrogen, and increases the likelihood of pests and diseases. When the same crop is grown repeatedly in the same field, it will use up the nutrients that the crop needs and eventually completely deplete the soil of those nutrients. This can also cause an imbalance in the soil microbiome, making it more susceptible to pests and diseases.
  4. Continuous Cropping – Give the Soil a Break: Continuous cropping is the practice of growing crops in the same field without giving the soil a break or rotating crops. This can lead to nutrient depletion, soil compaction, and increased pest and disease pressure. When soil is continuously cropped, it doesn’t have a chance to recover from the previous crop’s nutrient uptake. Soil compaction can occur when heavy machinery is used repeatedly on the same soil, making it more difficult for water and nutrients to penetrate the soil.
  5. Change in pH – The Soil’s Acidity and Alkalinity Levels: A change in soil pH can affect the availability of essential nutrients for plants. Soil with a high pH can limit the availability of nutrients like iron. While soil with a low pH can limit the availability of nutrients like calcium. When the soil pH changes, it can affect the soil’s ability to hold onto nutrients, making it difficult for plants to access the nutrients they need.
  6. Burning of Crops – Releasing Nutrients into the Atmosphere: Burning crop residues can release essential nutrients into the atmosphere, reducing the amount of nutrients available in the soil. While burning may be an effective way for many people to manage crop residues, it’s important to be mindful of the nutrients that are being lost. Burning can release nitrogen, sulfur, and other important nutrients into the atmosphere. Making them unavailable to the plants that need them.

As you can see, there are several ways that soil can lose its nutrients. Leaching, soil erosion, monocropping, continuous cropping, changes in soil pH, and burning of crops can all contribute to nutrient loss. As plant parents, it’s important to take steps to prevent these causes and maintain healthy soil for our plant kids.

Ways to Prevent Nutrient Loss in Soil

Soil nutrient loss has a significant impact on plant growth and health. Fortunately, there are several ways to prevent nutrient loss in soil and ensure that your plants have the nutrients they need to thrive.

  1. Use appropriate fertilizers in adequate amounts: One of the easiest ways to prevent nutrient loss in soil is to add nutrients back into the soil using fertilizers. However, it’s important to use appropriate fertilizers in the right amounts. Using too much fertilizer can actually have a negative impact on soil health and plant growth. Over-fertilization can alter the pH of the soil, which can cause further nutrient loss. One perfect choice for most indoor plants is Dyna-Gro Foliage Pro Plant Nutrition from PLANTZ.  This complete formula has all six essential macronutrients and 10 micronutrients for optimum plant growth in any medium.  Finally, always read the labels on fertilizers and follow the recommended application rates.
  2. Apply fertilizers at the right time: In addition to using the right amount and proper type of fertilizer, it’s important to apply fertilizers at the right time. Applying fertilizers when heavy rains are expected can lead to leaching of the nutrients. Which defeats the purpose of adding them to the soil. It’s best to apply fertilizers when the weather is dry or when light rain is expected. Plus, those heavy rains will wash the fertilizers away into ponds, lakes, and streams which can wreak havoc on an ecosystem.
  3. Make wetlands or filter beds to recover nutrients: Wetlands or filter beds can be used to recover nutrients from runoff or drainage water. These areas are designed to capture and filter water. Allowing nutrients to settle at the bottom where they can be reused. Wetlands and filter beds can be particularly effective in agricultural areas where large amounts of water are used for irrigation.
  4. Apply fertilizers according to the needs of the soil: Different types of plants require different types of nutrients. And soil conditions can vary from one location to another. To ensure that your plants have the nutrients they need, it’s important to apply fertilizers according to the needs of the soil. This means getting your soil tested for pH and nutrient levels so that you can choose the right fertilizer for your plants.
  5. Compost: Composting is a great way to recycle organic waste and add nutrients back into the soil. Composting involves collecting organic materials like leaves, grass clippings, and food scraps, and allowing them to decompose over time. Once the compost is ready, it can be added to the soil to improve its nutrient content.

Preventing nutrient loss in soil is essential for ensuring healthy plant growth. By using appropriate fertilizers, applying them at the right time, creating wetlands or filter beds, applying fertilizers according to the needs of the soil, and composting, you can help to maintain the health of your soil and ensure that your plants have the nutrients they need to thrive.

Reviving Old Soil

You may find yourself faced with the challenge of reviving old soil for your plants. Over time, soil can become depleted of nutrients, compacted, and lacking in the organic matter that plants need to thrive. Fortunately, there are several ways to renew old soil and replenish the nutrients your plants need to grow strong and healthy.

  • Blend with fresh soil: One of the simplest ways to revive old soil is to blend it with fresh soil. Adding fresh soil to your old soil will help to increase its nutrient content, as well as improve its structure and water holding capacity.  When blending old and new soil, it’s important to mix them thoroughly to ensure that the nutrients are evenly distributed. A good rule of thumb is to use a 1:1 ratio of old soil to new soil. Although this can vary depending on the condition of your old soil.
  • Mix in more nutrients: Another way to revive old soil is to mix in more nutrients. This can be done by adding organic matter like compost or aged manure to your soil. Organic matter is a rich source of nutrients like nitrogen, phosphorus, and potassium, as well as other micronutrients that plants need to grow.  To add organic matter to your soil, simply mix it into the top layer of soil with a garden fork or tiller. Aim to add about 1-2 inches of organic matter to the top layer of soil, and then mix it thoroughly.
  • Compost the soil: Composting your old soil is another effective way to renew it. Composting involves breaking down organic matter like leaves, grass clippings, and kitchen scraps into a rich, nutrient-dense soil amendment.  To compost your old soil, start by adding organic matter like leaves, grass clippings, and kitchen scraps to a compost bin or pile. Add a layer of old soil on top of the organic matter. And then repeat this process until the bin or pile is full.  Over time, the organic matter will break down into compost, which can then be mixed back into your soil. Composting your old soil is a great way to improve its structure and nutrient content, while also reducing waste.
  • Add water: Finally, adding water is a simple yet effective way to revive old soil. Soil that is dry and compacted can make it difficult for plant roots to access the nutrients they need to grow. By adding water, you can help to loosen the soil and make it easier for plants to absorb nutrients.  To add water to your soil, simply use a watering can or hose to saturate the top layer of soil. Aim to water deeply and infrequently, rather than giving your plants frequent shallow waterings. This will encourage plant roots to grow deeper into the soil, where they can access more nutrients and water.

Reviving old soil is an important part of plant care, and there are several ways to do it effectively. By blending old soil with fresh soil, adding organic matter, composting, and adding water, you can improve the structure and nutrient content of your soil. And give your plants the best chance to grow strong and healthy. Remember to always test your soil’s pH and nutrient levels before making any changes. And consult with the experts at PLANTZ if you’re not sure where to start. Happy gardening!

Conclusion

Soil is a crucial component of a healthy plant that requires proper management to maintain its fertility. Nutrient loss in soil can occur due to various factors. Such as leaching, soil erosion, monocropping, continuous cropping, change in pH, and burning of crops. It is essential to prevent nutrient loss to maintain soil health and ensure that plants have access to the essential nutrients they need to grow.

One of the best ways to prevent nutrient loss is by using appropriate fertilizers in adequate amounts. It is essential to apply fertilizers according to the needs of the soil and avoid overusing them. Which can affect soil pH and lead to further nutrient loss. Fertilizers should also be applied when heavy rains are not expected to prevent leaching.

Another way to prevent nutrient loss is by making wetlands or filter beds to recover nutrients from runoff or drainage water. These structures can help filter out pollutants and prevent nutrient loss, thus maintaining soil health.

Getting your soil tested for pH and nutrient levels is also important to determine the right type and amount of fertilizer to use. Soil testing can help you identify any nutrient deficiencies or imbalances. Allowing you to take corrective actions to improve soil health.

Reviving old soil can be a challenge, but it is not impossible. Adding fresh soil can help improve soil structure and provide essential nutrients. Mixing in more nutrients, such as compost or organic matter, can also help replenish nutrients and improve soil health. Composting is an excellent way to recycle organic waste and provide nutrient rich material to the soil. Adding water can also help improve soil moisture and support plant growth.

If you’re a plant parent or are aspiring to become one, taking care of your plant’s soil health is crucial for their growth and overall well being. Whether you’re dealing with nutrient-depleted soil or trying to prevent future nutrient loss, there are steps you can take to ensure your plants thrive. Start by implementing the tips and techniques discussed in this article to revive and maintain healthy soil for your plants.

Growing Fiddle Leaf Fig Trees: How to Take Care of Them

Fiddle Leaf Fig trees have been a trend in home décor for a decade.  They are gorgeous trees with thin stalks and glossy, broad, fiddle-shaped leaves (hence the “fiddle” in Fiddle Leaf Fig).  These trees have a striking appearance and will command attention in any room.

What is a fiddle leaf fig tree?

The fiddle leaf fig tree, or Ficus lyrate, is a plant lover’s dream.  With the proper love and attention, these beauties will stand proudly as a tropical focal point in any well-lit room.  They are native to the tropical rainforests of West Africa and are large, growing up to 50 feet in height in the wild.  With proper care, they will reach a height of around 10 feet indoors.  In its native environment, these trees produce edible fruits, but not the figs we are used to eating in our figgy pudding.  These fruits, while non-toxic, are unpleasant with a tart flavor and a mouth-drying effect. Outdoor fiddle leaf fig trees may bear fruit even when outside of its native environment; however, indoor fiddle leaf figs won’t produce any fruit.  They are ornamental indoor plants.  In order to bear fruit, the tree needs more sunlight than it can get indoors, and it also requires pollination.

The leaves of the fiddle leaf fig tree start out small and light green, but as those leaves mature, they turn a beautiful dark green color.  Because their leaves are so large, fiddle leaf figs are great air purifiers as their leaves capture toxins like formaldehyde and benzene and release oxygen into the air.  Simply having a fiddle leaf fig in your home will boost your mood and your well-being.

Does it matter how much sunlight Fiddle Leaf Fig Trees get?

Fiddle Leaf Fig Tree care can take a little time to get used to.  They can be persnickety when it comes to proper sunlight.  This plant needs a lot of light. Approximately 5 to 8 hours’ worth of bright, indirect sunlight is ideal.  Add in some ambient light when the sun isn’t so bright, and your plant should thrive.  If you are unable to provide a significant amount of sunlight for your Fiddle Leaf Fig, we recommend looking at other plant options for lower light areas.    Avoid north facing windows as these windows generally get less sunlight, and the fiddle leaf fig will not thrive there.  East, west, and south-facing windows are all ideal for this luxurious tree.

Of course, too much direct light will cause the leaves to get brown and crispy, while not enough light will cause the leaves to yellow as the tree’s ability to photosynthesize is reduced with a lack of sunlight.  Other signs that your fiddle leaf fig may not be getting the right amount of light include droopy lower leaves that eventually drop, shedding leaves, or brown leaf margins.

How to water Fiddle Leaf Fig Trees

As fiddle leaf figs require a lot of sunlight, they also get drier quicker and need more water.  However, overwatering your fiddle leaf fig is a bad idea and may cause serious damage like root rot.  The best practice for watering your fiddle leaf fig is to use a system like the PlantAssure Kit from PLANTZ.  These are sub-irrigation kits that take the guesswork out of watering your plant, ensuring no root rot will take down your home’s lush shrubbery.  They function by creating a reservoir at the bottom of the pot and using four wicks that absorb water from the reservoir and bring it up to the soil for the plant.  Using systems like these reduces the number of times your fiddle leaf fig will need to be watered.  If a sub-irrigation system is not right for you, then investing in a Soil Sleuth is the next best thing.  These probes gauge the soil moisture and will show you whether or not it is time to water your plant.  For a more in depth analysis on watering your plants, check out PLANTZ’s Watering Guide.  The watering guide provides useful information not only for fiddle leaf figs, but also for all of your house plants.

Signs your plant may be having water issues include dropping and dropping lower leaves and mushy leaf spots.  The process of elimination will help you in determining whether your plant is suffering from a sunlight or a watering issue.  If you are confident the tree is receiving enough sunlight, make sure you are watering your plant properly, or stop speculating and invest in a sub-irrigation system or moisture gauge to ensure your plant survives.

What is the best fertilizer for fiddle leaf fig trees?

Nutrition is another important factor in fiddle leaf fig tree care.  When ordering fiddle leaf fig trees from PLANTZ, your new plant will not need any additional fertilizer during the first six months of caring for it.  The soil is packed full of the nutrients your plant needs, thereby making fertilization unnecessary when you receive it.  After those six months, a quarterly dose of a complete fertilizer is the best path for your plant.  Foliage-Plus from Dyna-Gro is a great option for the fiddle leaf fig.  It contains a complete set of macro- and micronutrients for long lasting plants.  Your plant will also give you signs that it may need additional nutrition.  Keep an eye out for new leaves.  If they grow in yellow, consider supplementing your normal fertilization routine with an extra dose.

Conclusion

If you’re looking for a showstopper plant for your home or office, the fiddle leaf fig tree is for you.  Their large, lush green leaves are breath taking and coupled with their slender stalks, there is no finer focal point for your space.  These plants are perfect for creating a peaceful atmosphere by purifying the air, increasing oxygen, and helping you boost your mood and relax.  Create that zen-like atmosphere in your home or office today.  Contact PLANTZ.com to learn how to get a fiddle leaf fig shipped right to your front door.

FAQs

  1. Is the Fiddle Leaf Fig an indoor or outdoor plant? They can be either. As an outdoor plant, your fiddle leaf fig will have access to brighter light and pollinators which can lead to it bearing fruit.  Indoor plants will not get the same amount of bright light nor access to pollinators, so they will not bear fruit.  If you want the fiddle leaf fig as an indoor plant, remember to find a bright sunny place for it.
  2. Is Fiddle Leaf Fig care worth the work? The simple answer is yes.  They are generally easy to take care of as long as they have a space that provides bright light, and you adapt to the right watering schedule.  Use the PLANTZ Watering Guide to help you navigate the world of indoor plant watering and let that showstopping beauty make you the talk of your neighborhood.
  3. Are Fiddle Leaf Figs a tree or a bush?  They can be either.  The plant tends to grow more in a bush form, but with careful attention and precise pruning you can train your fiddle leaf fig to grow into a tree.  The key here is patience.  It takes a while for these plants to grow before you can train it.

Ponytail Palm: A Guide to Finding the Perfect Plant for Your Home

Are you looking for a unique plant that will add a tropical vibe to your home?  PLANTZ has the plant for you: the Ponytail Palm!  This stylish plant doesn’t crave a lot of attention from its plant parents. But it does love to be in the spotlight!

Definition of Ponytail Palm

 Ponytail Palms, also known as the Beaucarnea recurvata or Elephant Foot Plant, is not really a palm at all!  It’s what PLANTZ likes to call a “tweener”.  It looks like palm (Arecaceae) and is in the same family as a Dracaena (Asparagaceae), but is really in a league of its own, because ultimately it is more like a succulent.  Native to eastern Mexico, the Ponytail Palm has become a popular houseplant due to its low-maintenance care requirements and rather unique appearance.

The Ponytail Palm features a trunk that becomes swollen and enlarged or bulbous at the bottom, resembling an elephant’s foot (hence the nickname).  The swelling is due to the plant retaining and storing extra water for the dry season, making it drought tolerant and a great option for new plant parents who may be a little forgetful at first about watering plants.  The lush green leaves of the Ponytail Palm are long and slender and grow in a cascading fashion from the top of the trunk, kind of like a ponytail.

The leaves of the Ponytail Palm are usually around 2-3 feet long and can grow in a range of different directions.  Some grow straight up, while others may twist or curl.  Its unique appearance makes it a popular choice for indoor plant owners as it adds a touch of character to any space. Don’t be surprised If you encounter a Ponytail Palm with multiple heads.  Most Ponytail Palms have a single main stem; however, they will sometimes have multiple heads with leaves on them.  Ponytail Palms from PLANTZ are single stem and single head plants that won’t require any pruning of the stem.

In addition to its unique appearance, the Ponytail Palm is super easy to care for.  Because this plant stores water in its trunk, it is drought tolerant and can go for long periods of time without being watered.  You do need to make sure you do not overwater this plant as it can cause root rot.  Ponytail Palms love bright light and do best in a south, east, or west facing window.

While this plant will adapt to lower light conditions, it’s better to err on the side of caution and give the plant as much bright, indirect sunlight as possible.  It’s a good idea to keep the leaves of this plant clean since it relies on the leaves to capture sunlight for photosynthesis, but be careful when cleaning it.  These plants have tiny serrations on the edge of the leaves and can irritate your hands.  The best practice for cleaning is to use a towel with light soapy water, or better yet, stick it in the shower and give it a good rinse.

Importance of finding the right plant for your home

When it comes to adding plants to your home décor, there are few as eye-catching as the Ponytail Palm.  With its swollen trunk, cascading leaves, and ponytail-like look, it’s no wonder this plant has become an indoor favorite.  However, finding the right plant for your home is important if you want to ensure the plants’ health and longevity.  It’s difficult to adapt your home to your plants, but it is easy to shop for lush plants that will thrive in the conditions present in your home.  Two considerations should come into play when shopping for plants for your home:  space and light.

One of the first things to consider when looking for the right plant for your home is the amount of space available for your plant.  While Ponytail Palms can grow quite tall, they are also available in smaller sizes that make it more suitable for indoor spaces.  These plants are slow growers, so buying small will ensure you have enough time to adjust for any growth over the years.

Lighting conditions in your home play a crucial role in maintaining the health of your plant.  If you have space in your home that provides bright, indirect light, the Ponytail Palm is the right choice for you!  While it may survive in lower light conditions, it will thrive in bright, indirect light.  Who wants just an ok plant?  Give your Ponytail Palm bright light and watch it steal the show.

Factors to consider when selecting a Ponytail Palm

Once you have determined that the Ponytail Palm is right for you and your home, it’s time to find the perfect plant!  Keep in mind the following tips to ensure you select the right Ponytail Palm for you:

  • Check the leaves: Look for a plant with firm, upright leaves that are a vibrant green.  Avoid plants with yellow or droopy leaves, as this may be a sign of stress or disease.
  • Check he trunk: The trunk of a Ponytail Palm should be sturdy and straight, without any signs of damage or rot.  If the trunk is soft or spongy to the touch, this is evidence of disease or poor health.
  • Check the roots: If possible, gently lift the plant out of its container to check the root system.  Healthy roots should be firm and white or light brown in color.  Avoid plants with mushy or brown roots, as this could indicate root rot, which can kill your plant.
  • Look for new growth: Healthy Ponytail Palms will produce new growth from the center of the plant.  You want to find a plant with fresh, new leaves emerging from the center of the head.
  • Choose the right size: Ponytail Palms vary in size from small tabletop plants to large outdoor trees that can reach heights of 30 feet.  Since these plants are slow growers, make sure you choose a plant that is appropriate for the space you have available in your home.
  • Buy from a reputable source: PLANTZ specializes in providing healthy, high-quality plants for people’s homes.  Our plants are fully fed when you receive it and are provided with enough food for 6 months after the plant has shipped.  They come free of pests and disease and are ready to become the focal point in their new home.

Indoor vs. Outdoor Ponytail Palm

Ponytail Palms are not only popular for indoor settings, but they can also thrive outdoors.  There are some important factors to consider when deciding whether to grow them inside or outside:

  • Lighting: Once again, lighting is a key factor when choosing whether to put your new Ponytail Palm inside or outside.  Indoor Ponytail Palms prefer bright, indirect light, while outdoor Ponytail Palms can tolerate full sun to partial shade.  If you choose indoors, it’s important to reiterate that the plant should be placed near a window that receives plenty of light throughout the day.
  • Temperature: Ponytail Palms are native to desert environments and prefer warm temperatures.  Indoor plants should be kept in a room with mild to warm temperatures.  Outdoor plants are going to be exposed to more temperature fluctuations than indoor plants.  Therefore, if you live in a cold, wintery climate, outdoor Ponytail Palms may not be the solution for you.
  • Size: Ponytail Palms can get to heights of 30 feet outdoors.  That is not ideal for most indoor spaces.  Fortunately, these are slow growing plants that can live for decades.  Buy small for your space and let it grow and fill in the gaps over time.
  • Maintenance: While Ponytail Palms are low maintenance plants in general, their care differs depending on whether they are indoor or outdoor plants.  Dry indoor air may cause the soil to dry out faster than outdoors, requiring less time between watering.  Outdoor Ponytail Palms may burn through nutrients faster if they are in direct sunlight and may require more frequent feedings.  Keep an eye on your plant, it will tell you when it is not receiving the care it needs.
  • Aesthetics: Take into consideration the overall look of the plant and how it will fit into your décor.  If you are looking to add a tropical vibe to your space, then an indoor Ponytail Palm may be the right choice.  If you’re looking for a tropical focal point for your garden that your neighbors will be envious of for years to come, then a well-established Ponytail Palm will suit that need.

Ultimately, the decision to grow your Ponytail Palm indoors or outdoors will depend on your specific environment and preferences.  Both will thrive with proper care and attention, an both will be a wonderful addition to your space.

Benefits of owning a Ponytail Palm

Ponytail Palms are popular houseplants for a variety of reasons.  Here are some of the main benefits of owning a Ponytail Palm:

  • Air purification: These are one of the top plants for air purification.  Their long leaves are great at removing carbon dioxide and carbon monoxide and releasing oxygen.  They also improve air quality by removing harmful toxins like benzene and xylene.
  • Reduce stress: By purifying the air and releasing extra oxygen, Ponytail Palms also play a role in reducing stress.  Inhaling deep breaths of clean, fresh air is a great way to reduce your blood pressure and bring a sense of calm into your space.
  • Unique appearance: With their distinctive palm-like shape and long, curly leaves, Ponytail Palms are a striking addition to any space.  Whether used as a small tabletop plant or a large outdoor tree, the Ponytail Palm is sure to bring in the compliments.  Plus, they fit into just about every décor theme and scheme.
  • Great investment: Ponytail Palms have long lifespans and are low maintenance, making them a great long-term investment in your health by reducing stress and cleaning the air.
  • Symbolic meaning: Some cultures believe the Ponytail Palm brings luck and prosperity into the home, and others see it as a symbol of resilience and strength, making it a great gift for friends and family!

Conclusion

Are you ready to add the Ponytail Palm to your home?  Then PLANTZ has the plant for you!  They offer two types of Ponytail Palms, both in grow pots:  a 2-3 foot plant or a 3-4 foot plant.  Choose the one that will work best in your available space.  Shop online with PLANTZ today and Invest in a new plant best friend!

F.A.Q.s  –

  1. Where can I find a Ponytail Palm? The best place to buy a Ponytail Palm is online with PLANTZ. The quality of their plants is unmatched, just like their customer service.
  2. How are Ponytail Palms low maintenance? Ponytail Palms are native to arid landscapes.  Their trunks store water.  This plant is very forgiving if you forget to water it.  As a matter of fact, less is better.  Ignore this plant and watch it thrive!  It’s only sticking point is that in order for it to be as lush and vibrant as possible, it does need to have access to bright, indirect light.
  3. Are Ponytail Palms toxic? Ponytail Palms are non-toxic to dogs and cats.  They do have slightly serrated edges, so be careful when handling.
  4. Can Ponytail Palms be grown I containers? Yes!  Ponytail Palms make excellent indoor plants.  Choose a pot with good drainage and use a well-draining potting mix.
  5. Can I grow a Ponytail Palm outdoors? Yes!  They make excellent additions to outdoor landscapes.  When out of a container, they can reach heights of 30 feet!
  6. Do I need to prune my Ponytail Palm?  PLANTZ provides single head Ponytail Palms, so no pruning of the stem will be necessary.  If the leaves get brown tips, use sharp scissors to cut off those tips.  If the whole leave goes brown, the best practice is to remove the whole leaf at the stem.

Spring Houseplant Care Tips

Spring has sprung.  The time of rebirth is upon us! The once cold, gray outdoors has come to light.  The sun is shining brighter, birds are singing gleefully, and plants are waking from their long rest.  You’ve spent all winter waiting patiently to prune your fiddle leaf fig or for your monstera to sprout another Swiss cheese leaf.  It’s finally time!  Hallelujah!  It’s growing season again!  In order to give your plants the best opportunity to flourish and thrive, follow the below tips from PLANTZ and watch your plants lavish you in green splendor.

Transplant or Repot 

Perhaps you spent the winter rethinking your décor, and your current pots don’t fit your style anymore.  Or maybe you used your extended wintry indoor time rearranging and redecorating your home.  Maybe you finally realized your Janet Craig could use a larger pot.  Whatever the reason, spring is a great time to repot those plants and give them the space and the style they deserve.

Steps 

The first step in transplanting or repotting your plants after a long, hard winter is to congratulate yourself.  You stayed strong.  You did what was best for your plant and controlled every compulsion to do it all over the winter.  So, pat yourself on your back and put on your garden gloves.

If your plant has grown, it is obviously important to buy a pot that is larger than your current pot.  It should not, however, be excessively larger.  Increase the pot size by about two inches and your plant will have a happy new home where it can spread itself out with new growth.  Anything more than a couple of inches will require more soil which can lead you down the unwanted path of overwatering and root rot.

Next, pack some new potting soil into the bottom of the new pot to provide a base for your plant.  Now it’s time to put your beautiful, lush plant baby into its new pot.  Don’t pull the plant out of the existing pot by its stems or leaves.  Tilt the pot to the side or even turn it upside down, and tap on the bottom of the pot, letting gravity do the work while protecting the fragile backbone of your plant.

Once out of the old pot, inspect the roots for any issues, like root rot, loosen them up if they are packed in tight.  If you see any roots that have issues, prune them away gently, ensuring not to damage any surrounding roots.  Also, start working away the old soil attached to the roots and base of the plant.  This ensures that when you put your plant in the new pot and cover it with new soil, it is receiving fresh nutrients from the soil and eliminating anything negative from the old soil.

Finally, place your plant gently into the center of the new pot, adding new potting soil.  Don’t pack the soil in. Allow it to stay loose.  Also make sure to leave a space between the top of the soil and the lip of the pot or there may be issues watering the plant later.

Give Houseplants a Spring Feeding 

Your plant may be in desperate need of nutrients after a long winter.  As your plants reawaken, make sure to give them the nutrients they need to thrive in the spring.  Fertilizers come in a variety of shapes and sizes from liquid to slow release to granular.  Choose the right fertilizer based on the needs of your specific plant.

How Much to Add 

If you have just repotted or transplanted your plant with fresh potting soil, you should not need to fertilize your plant for a few months.  That fresh potting soil is chock full of needed nutrients.  For plants that have not been repotted, make sure to read the labels on the fertilizer carefully and follow the instructions precisely.  This is crucial as over fertilizing plants can cause severe damage to them. 

Bring Plants Outside

If you bring your outdoor plants indoors during the winter, wait until the temperatures are consistently above 50°F before you start to move them back outdoors.  Also, remember they’ve been in a low sunlight location for the past few months.  Much like our eyes when we leave a dark movie theater, plants need some time to adapt to the bright sunlight again.  When you move them outdoors, find a shady spot to place them for a few days and slowly move the plants that require more direct sunlight in brighter locations.

Are you looking to add some plants to your home this spring?  Order your very own indoor plants from PLANTZ.com today!

How to Care for Your Plants During the Winter Months

The cold winter months are a time of dormancy and hibernation in the living world.  From hibernating bears to naked trees, it seems as though life almost comes to a standstill during the winter.  During these cold months, leaves have fallen from trees and there are no flowers in sight, but all is not lost.  Yes, the cold may be harsh for plants, even indoor plants, but there are ways to care for them that allows your plants to continue to thrive even as the temperatures outside drop.

Watering Houseplants in Winter

All plants require water at some point, even if it is only a small amount once a month or so.  In winter, the amount of water many of your plants need changes.  Follow these tips to ensure your plants receive the right amount of water to keep them thriving in the winter.

Frequency of Watering

Since many indoor plants are dormant during winter, it may not be necessary to water them as frequently as you do in other seasons.  The air in the winter is drier than usual, and while that may seem like your plants will need more water during the winter months, that is not true.  The rate of growth for plants in the winter slows down, for some to the point of dormancy.  So before watering your plants in the winter, do a finger test to see if the soil is dry.

While the top portion of the soil may dry out, that is not a great indicator of the moisture levels in the rest of the soil.  If you are relying on the finger test to figure out your plants’ watering needs, make sure you push your finger down about two inches into the soil to get a feel for how dry the soil may be.  If the finger test is unappealing, Plantz.com offers the perfect solution for you.  Their Soil Sleuth is essentially a probe that is inserted into the soil that takes the guesswork out of deciding if your plant’s soil is wet or dry.

Room Temperature Water

 Tropical plants are popular indoor plants.  These plants take particular exception to cold climates.  They do not like the cold and need extra help during the winter months.  One way to ensure the cold does not damage your plants is to use room temperature water for your plant babies.  Often times in the winter, cold water is made even colder when coming out of a faucet.  Using this cold tap water will shock your tropical plants, potentially causing irreversible damage to them.  If you are choosing to use tap water, make sure to let it get to room temperature before adding it to your plants.

Don’t Get Saucer Saturation

 One sure way to damage your plants in the winter months is to overwater them.  Overwatering plants or letting plants sit in a pool of water will cause root rot in your plants.  Root rot develops when the plants are provided with too much water causing the roots to literally rot.  Healthy roots are light colored.  Roots exhibiting symptoms of rot are brown or black.  Indications that your plant may be overwater include mushy leaves, brown leaves, yellow, wilting leaves, and soil that never dries out. Make sure your planters have drainage holes allowing excess water to filter through the plant and out of the planter itself to promote a healthier plant.

For many new plant parents, the watering process can be overwhelming.  Plantz.com offers a great option to make sure your plants are getting the right amount of water and are not in danger of being overwatered.  The PlantAssure Sub-Irrigation System extends watering intervals by creating a reservoir from which the plant may draw water when it needs it through a series of wicks.

Exposure to Light

Plants need access to some form of light in order for photosynthesis to occur so plants can survive.  Sunlight in the winter is limited, and plants need to capitalize on as much sunlight as they can.

Keep Them Moving

 Moving your plants closer to windows to ensure they get more light will help them stay healthy.  To ensure they grow evenly, rotate your plant one quarter of a turn when you water your plants to ensure all of the plant receives an equal amount of light, helping them to grow evenly.  This will also help keep your plants from stretching and getting leggy trying to reach for extra sunlight.

Fertilization Feeding

 As growth slows during the winter with some plants going completely dormant, the amount of food your plant needs to thrive reduces as well.  Overfeeding plants during the winter can damage them.

Slow Down on Fertilization in the Winter

 Resist the urge to fertilize your plants during the winter.  It’s best to let your plants be during the winter and wait until spring to continue feeding your plants.  Fertilizing in the winter as the plant’s growth slows can lead to brown leaves.

Considering Transplant or Repotting

 During the winter people in some areas may see themselves spending more and more time inside as they avoid frigid temperatures.  Many times, this extra time indoors leads to redecorating.  If you’re considering transplanting or repotting your plants in the winter, don’t do it.

Hold Off

Seriously.  Don’t do it.  Transplanting or repotting plants is best done in the summer when the plant has thick growth and strong roots.  Repotting during the winter can send your plant into shock which will damage and sometimes kill your plant.  If you’re desperate to repot, remember spring isn’t too far away.  Wait for those warmer months to reduce damage to your plants.

Thermal Check

Dry air and artificial heat used in winter can cause damage to your plants.  Follow these tips to ensure your plants adjust well to the drier air.

Keep Houseplants Away from Direct Heat Sources

Plants don’t appreciate extreme temperature fluctuations.  Whether your heating unit is a central unit, stove, or fireplace, make sure your plants are far away from the heating unit.

Keep Away from Cold Drafts

Avoiding extreme temperature fluctuations isn’t only important when it comes to heat.  It is just as important for plants to avoid cold drafts indoors.  Keep plants away from doors and drafty windows.  If you are trying to ensure your plants get enough sunlight and move them to a window, set them near the window, but not directly on the windowsill.  This will help keep your plants from freezing.

Humidity Boost

Dry winter air can be hazardous to the health of your indoor tropical plants.  They thrive in humidity.  One way to provide that much needed humidity for your plants is to purchase a humidifier and keep your plants near it.  If investing in a humidifier for your plants is too costly, frequently misting your plants with room temperature water will help them battle the effects of the dry winter air.

Winter Cleaning Routine

Winters can be harsh on plants with its reduced humidity and lack of sunlight.  One way to help your plants with winter photosynthesis is to keep their leaves clean.

Winter Cleaning Routine

 Dust is a part of not only human lives, but also plant lives.  As dust and other debris accumulates on the leaves of your plants, the leaves are not able to absorb as much sunlight as normal.  Adequate sunlight is vital to the photosynthesis process.  Without it, plants will have issues feeding themselves, stunting their growth.  Cleaning your plants is an easy task that allows you special time to bond with your plant baby.  This process is easily completed with a moist cloth. Gently wipe the leaves of your plants to remove any dust and debris.  Areas that receive higher traffic or exposure to the outdoors may need their leaves cleaned more often.  Best practice is to rub your finger over a leaf or two.  If there is dust, clean the leaves.  Your plants will thank you!

Pests

As stated above, winters are a time of slow growth for plants.  The drier air and lack of sunlight takes a toll on the plants causing them to be less strong than in the spring or summer.  Weakened plants are great targets for invaders.  These pests are looking for warm, cozy places to set up a new home.  It’s always better to get ahead of the problem when plant pests are involved.

Keep Your Eyes Open

Use your winter cleaning routine to inspect your plants for any sort of infestation.  Check for any unusual spots or other odd leaf markings.  Common pests in household plants include fungus gnats, whiteflies, mites, and mealy bugs.  If you notice multi-legged pals living in your plants, quarantine the plant to avoid any spread of the infestation.  If there are only a few pests, you can pick them off by hand.  However, you run the risk of not getting all of the little buggers.  It’s best to wipe down the plant with a soapy, wet rag.

Decorative Covering

Many plant parents add decorative features to their plant pots to help blend with interior décor.  Coverings such as moss, river rocks, shells, and stones or marbles are increasingly common and give a decorative flair to your plants.  But are they beneficial to your plants in the winter?

Push Back or Remove

It is best practice to push back or remove the coverings in the winter.  The primary reason for this is so that the soil is open to the air, allowing it to dry out better in between waterings.  The coverings allow the soil to remain moist for longer periods of time which can cause significant harm to your plants.

Winter F.A.Q.s

Get quick quick answers on how to protect your plants in the winter:

  1. Is cold air good for my plants? Most indoor plants prefer consistent temperatures that fall between 65° and 75°.  Keeping your home in that range is the best option for your plants.  If the temperature inside takes a large drop below 50°, your plants will be at risk of serious damage.
  2. Can I water my plants in the winter? Yes, but water them less often.
  3. Can I repot my plants during the winter? This is not advised.  Best practice is to wait until the spring/summer to repot your plants.
  4. Do my indoor plants need more humidity indoors during the winter?   Mist your plants to ensure humidity levels stay high and to help your plants survive the drier weather.
  5. Why is my plant by my front door dying? Your plant is probably dying due to the effects of cold weather.  Plants near doors, especially frequently used doors, face extreme temperature changes and are susceptible to drafts.
  6. Should I fertilize my plant in the winter? It’s best if you allow your plant to rest during the winter.  The need to replenish depleted nutrients is not as high in the winter because the plants are in a dormant or semi-dormant state and are not using much energy.
  7. How can I make sure my plants get enough sunlight? If you are not using any grow lights in your house, make sure your plants leaves are clean of dust and debris and set them near a window, but not on the windowsill in order to protect them from any drafts.

The Effect of Light on Plant Growth

All plant parents want their babies to grow up to be captivatingly lush and healthy adults.  One of the greatest factors in determining your plant’s health is the amount of sunlight available.  Not all plants are the same. And determining the right amount of light for your plant can sometimes be a challenge.  The following guide will help you understand the effect light has on plants and why it is important. Providing the answers you need to better understand your plant’s light needs. 

Significance of Light for Plant Growth 

Light is what makes your Fiddle Leaf Fig a focal point in your living room and creates the treasured splits in the leaves of your Monstera Deliciosa.  Light is vital to the health of your plants. And it requires the right balance in order for your plant to grow and flourish.  Without proper lighting, your plant will not be able to grow, bloom, or seed.  There are times you may notice a plant leaning towards the sun.  This is a process called phototropism, where hormones in plants that are sensitive to the presence of light direct the plant’s stem to lean towards the sun or light source in order to have access to more light. Knowing and providing the correct lighting requirements for your prized plants will ensure they remain vibrant and alive for years to come. 

Function of Light in Plant Growth 

Most living things on Earth rely on photosynthesis for their survival, whether directly or indirectly. Maybe you remember the term photosynthesis from your high school biology class. Or perhaps you’ve heard of the seemingly green pigment in plants called chlorophyll.  Photosynthesis is defined as the process by which plants transform light, carbon dioxide, and water into chemical energy. 

During this process, light energy is captured and transforms the carbon dioxide and water into sugar and oxygen.  The sugars are needed to give the plant energy and for the creation of cellulose. Which helps make the cell walls of plants strong.  Leaves are the light gatherers on plants, and inside the leaves are small plant organs called chloroplasts.  Those chloroplasts house a pigment called chlorophyll.  Chlorophyll in the leaves absorbs red and blue light for photosynthesis and then reflects out green light. Which is why chlorophyll looks green to the human eye and why our plants are typically varied shades of green. 

The importance of light in its support of living matter on Earth cannot be understated.  The cycle of photosynthesis not only makes plants grow bigger and stronger. The “waste” created by plants during photosynthesis, oxygen, is vital to the survival of most living creatures. Humans reciprocate in the process by inhaling the oxygen supplied by plants. And exhaling the carbon dioxide needed by plants for photosynthesis.  This symbiotic gas exchange supports life as we know it. 

Types of Light for Plant Growth 

Different plants have different light needs. Don’t let the plant tags confuse you.  When you purchase a new plant, you should have a feel for the natural lighting in your home and a general understanding of the conditions of the natural lighting certain areas in your home receive. There terms used on plant tags to describe the various light levels needed for different plants are:  bright direct light, bright indirect light, medium light, and low light.   

Bright direct light means the plant requires placement on a windowsill or someplace where it will be in the path of constant sunlight.  Bright indirect light means the plant should be located near a window. But not directly on a windowsill where it would capture constant rays of sunlight.  Medium light plants require filtered light that can be obtained in shady areas of your home.  Low light plants are able to stay healthy with minimal sunlight and may be placed almost anywhere in a home. 

Of course, natural sunlight is not constant. And the availability of natural light in a window may change with the seasons depending on your region’s latitude.  Not all plants are able to survive in all climates.  Winter can be extremely harsh on tropical plants due to the drier air and lack of sunlight the closer to the poles you are.  Fortunately, we humans have found ways to help plants adapt to low light situations!  By bringing plants indoors and utilizing artificial light, plants that were unable to tolerate colder climates are now able to survive harsh winters indoors.   

Features Plants with Unbalanced Access to Light 

Your plants will have no problem letting you know that they need their light adjusted.  A full and dense plant with bold leaves and straight stems is a great indicator that your plant has the right amount of light available to it.  For situations where the plant is exposed to too much light, the plant’s leaves may droop and then change color.  You will notice that the leaves will yellow or have brow spots.  Dry spots and the browning of leaf tips are also indicators that your plant is receiving too much light.  Crispy leaves are never a good sign. Eventually the plant may curl downwards, and growth will slow.   

Plants that receive too little light will also alert you to their problems.  Because they are unable to complete the process of photosynthesis and the creation of chlorophyll, leaves of plants receiving too little sunlight will become pale in color and may become yellow.  Plants lacking adequate sunlight may also see their leaves drop and a significant lack of growth.  If your plant is a bloomer, a lack of sunlight may cause the plant to not produce flowers.   

Fortunately, once your plants have alerted you to their problem, it should be an easy fix.  Find a new spot with less or more light, depending on the plant.  Once you find the right space, it shouldn’t be too long before your plant regains its strength and starts to flourish again. 

Light Considerations for Proper Plant Growth 

Plants have adapted to gathering light from whatever source or sources it can find to survive.  While sunlight is the preference, artificial light can also fill any gaps not fulfilled by natural light.  In order to provide the best home possible for your plants, it is worth knowing what windows work best with which plants and what types of light are emitted from artificial lighting. 

Natural Light from a Window 

Another light aspect to consider when bringing plants home is the direction in which the window faces.  South facing windows are the perfect spot for plants that require bright light.  Plants like the ever popular Fiddle Leaf Fig or the luxurious White Bird of Paradise are perfect for bright south facing windows. North facing windows are not only directionally opposite of south facing, they are also the worst for plants that need bright light. 

North facing windows receive very little light and are optimal for low-light plants like the ZZ plant or the Lisa Cane.  These plants will thrive in a corner with filtered light.  East facing windows do not receive bright direct sunlight. But they do receive enough indirect sunlight that medium light to low light plants will be able to make a happy home. West facing windows receive the late afternoon sun and may provide a little direct sunlight for your indoor plants.  West facing windows are perfect for most indoor plants and will help plants thrive.   

Low Light from a Lamp Light 

Plants need to be able to carry out photosynthesis to survive.  Photosynthesis requires two specific colors of visible light, red and blue.  Each one provides a different benefit to the plant.  Blue light promotes the growth of leaves and stems, creating a fuller and denser plant.  Fluorescent lights are able to stimulate leaf and stem growth in green plants. The red rays of light act as a sort of watch for the plant, allowing the plant to tell the time of day or year for the purposes of flowering or seeding. 

Incandescent lights are optimal for red visible light.  Only relying on red light will cause your plants to become long and leggy. Lacking that dense, full growth obtained through the inclusion of blue light. Ideally, when choosing artificial light supplies for your plants, you want to ensure the plants have access to both blue and red light rays.  University studies have shown that low light plants with access to 30 watts of incandescent light and 100 watts of fluorescent light are able to survive in artificial light situations.  It is important to note that artificial light also may damage your plants by making them too hot.  As with natural light, a delicate must be maintained in order for your plant to thrive. 

PLANTZ has complete care guides for all of their plants.  Check out the PLANTZ online shop and see which plants will work best in your home! 

 Let’s shed some light on plants with some FAQs on lighting: 

  1. How can I make sure my plant is getting enough light?  Keep an eye on your plants.  They will absolutely alert you to any lighting issues.  Dry, crispy spots or full leaves are a strong indication of too much sun.  Plants with pale or yellow leaves or plants that are dropping leaves with stunted growth indicate a lack of adequate sunlight. 
  2. Oh no!  My plant needs more/less light!  What do I do?  Take a look around your home and get a feel for the natural light in your home.  For plants that require low light, shady areas, choose a north facing window.  For plants that need bright light, choose a south facing or west facing window.   
  3. How do I know what direction my window is facing?  If you are unable to find out what direction your window is facing, use a compass.  You can either download an app on your phone or purchase a handheld compass to locate the correct direction. 
  4. The winters where I live have short daylight hours.  What do I do?  One option is to place your plants near windows to ensure they receive as much light as possible.  Clean the leaves on your plant to make sure the plant is able to gather light on as much available space as possible.  If you still encounter problems, set up an artificial lighting system. But take care not to harm the plants with too much heat. 
  5. What plants are great for low light areas?  PLANTZ has an abundance of low light plant options in their online shop.  Examples of plants offered that will thrive in low light scenarios are the extremely low maintenance ZZ Plant, the lush Janet Craig, and the perky Snake Plant. 
  6. I have a really bright window.  What plants will work in this spot?  Plants that love to capitalize on super sunny windows include the tropical Areca Palm, the  beautiful Ficus Daniella, and the trendy Fiddle Leaf Fig. 
  7. Where can I find all of these plants?  The easiest way to shop for indoor plants is the PLANTZ online store.  Each plant offered has a detailed description of the care required.  PLANTZ doesn’t pull any punches.  While they certainly want you to buy their plants, they want to make sure those plants are long lasting additions to your home.  Their guides lay out the facts and helps even the newest of plant parents to choose the right plant for their space. 

Overwatering Your Plants? Plantz Can Help

If you love plants, you want to take good care of them. Making sure they have the right soil, sunlight, and nutrients ensures that your plant will provide the beauty and other benefits you want in your living or workspace. And the most frequent way people care for their plants is to water them.

But if you’ve heard the phrase “too much of a good thing,” you know that overdoing something helpful can sometimes be quite harmful. And that axiom is never truer than when it comes to watering your favorite houseplants. Overwatering inhibits growth, hurts foliage, and can be fatal if not stopped in time.

Signs of overwatering

If your houseplant’s growth slows or you see browning tips and curling leaves, that’s a sign that your plant is suffering from too much water. Unfortunately, those can also be signs that your plant is not getting enough water. And since the solution for underwatering is adding water and moisture, the wrong diagnosis can lead to exacerbating the very problem you’re trying to solve. This dangerous pattern, along with not knowing how much water a particular plant needs to thrive, is why overwatering is such a common problem and can be difficult to diagnose in time.

Why are the symptoms of overwatering and underwatering similar? It’s all in the roots. Without a healthy supply of oxygen, a plant’s roots will drown in too much water or moisture. They become soggy and soft, and cannot provide the necessary water and nutrients to the leaves. The leaves behave as if there was a lack of water since they aren’t getting enough nutrients to thrive. Eventually, the plant’s roots cannot provide physical support or water, and the plant dies. Obviously, it’s important to diagnose and treat the problem before that happens.

Fixing the Problem

Once you’ve recognized an overwatering situation, there are different levels of remedy. The first (and easiest) is to simply stop watering and give the soil a chance to dry out. But in severe cases, you might need to repot your plant. Check the roots and remove the ones that look mushy and irreparably damaged. Then place it in soil that drains well, and in a pot that also drains well. Hopefully, this will be the fresh start your plant needs to thrive again.

Preventing Future Issues

To avoid problems going forward with overwatering (and even underwatering), Plantz.com recommends the following tips:

Know your plant. Different plants have different needs, and making sure it has the right sunlight and watering schedule is essential to keeping them happy and healthy.

Use good soil. Make sure your houseplant has soil that drains properly and remains aerated at all times.

Get the right pot. The pot should have good drainage, ensuring water doesn’t accumulate under normal conditions.

Check the soil properly. Note that last word, “properly.” Checking soil is more than sticking a finger in the top part of the pot and seeing if it’s dry or moist. In fact, that’s a good way to begin the bad habit of overwatering. It’s best to check the soil closer to the roots, and your finger is not designed to be the optimal moisture-checker when it comes to houseplants.

Fortunately, you can get a tool that has been optimized for checking soil right here at Plantz.com: The Soil Sleuth. Simply push the tool to the bottom of the pot, twist, and bring it back up. The notches capture soil near the roots so you can inspect it for yourself and make the best decision as to watering. And while you turn, it aerates the soil near the roots, ensuring they get enough oxygen as well.

More Questions? Plantz Has Answers

If you have more questions about watering, we’re here to help. Simply contact us for more advice on getting your plant on the road to recovery.

New Year, New Plants With Plantz!

The beginning of each year is a time when many people make resolutions to improve their lives. So why not include plants in those resolutions? They definitely improve our lives, after all. Plants enhance people’s moods, make them calmer and more creative, and help clean the air we breathe. Plus, they can transform the decor of our living and workspaces, both inside and outside. Letting more plants into your life is a worthy resolution for anyone trying to add positivity to their surroundings.

Of course, the term “more plants” will have different meanings for different people. You might be starting from scratch, with no idea what to do and no experience taking care of one. You might have some of the basics down and are finally ready to try something a little more challenging. Or you might be considered an expert plant parent and want to see what’s out there that you haven’t tackled yet. Whatever your skill level there are plants that are right for you and plant-related activities you haven’t tried yet. All it takes is an open mind and a little guidance. As long as you have an interest, Plantz can take care of the rest.

How Green is Your Thumb?

For detailed information to take your plant parenthood to the next level tomorrow, you have to determine how much you know today. Here are a few levels of plant experience:

Absolute Beginner

New plant parents might be intimidated by the idea of caring for a different species that depends on you for everything. While some people seem to know everything about plants, maybe you can’t tell a Palm Tree from a Peace Lily. You don’t have a green thumb; you’re all thumbs. Should you even try to adopt plants?

The answer is yes, absolutely! At Plantz, we know that there’s a plant for everybody. No matter how inexperienced you are, or how challenging it might seem, there’s a plant you can care for, help thrive, and reap the benefits of the interaction. It’s just a matter of knowing how to start, and finding the right species to meet your needs and skill level.

Plant care – Your plant will need water and sunlight; those things are non-negotiable. But how much water and how much sunlight will depend on what type of plant you get. For a beginner, you’ll want a hearty plant that’s very forgiving when it comes to both. If you forget to water sometimes, it’s not the end of the plant. If it doesn’t get a lot of sunlight, it’s okay. In fact, some plants don’t want a lot of water and do just fine in conditions with very little light.

In many cases, new plant parents go wrong by overwatering, and exposing a plant to more light than it needs. It’s important to know as much as possible about your new plant, and care for it accordingly.

Starter plants – You can’t go wrong with a Sansevieria or a Ficus elastica. But don’t be intimidated by their official names. You probably know them as a Snake plant or a Rubber plant, so keep it simple and try one of these forgiving species. Light and water needs are minimal, and they’ll still thrive if you’re not perfect with your schedule. There are other good starter plants as well, but it’s good to stick to a common species that will help you learn the ropes and not worry too much about failure.

Share! If you’re new to plant care, feel free to share. Take photos of their growth and share your progress and experiences on social media. You’ll let people know about your new hobby, and you’re bound to learn that you’re not alone. Acquaintances, friends, and even family might reveal that they also love plants, and they’ll probably be happy to share their own tips. You’ll improve your life with a new activity, and you’ll learn something about the people you thought you already knew. You can make new friendships and enhance the ones you already have by sharing your new love for plants. It’s a win/win for everybody, including the plant!

Intermediate Plant Parents

Some people are well past the beginner stage and know how to care for their plants. But they’re not exactly experts, either. Somewhere in between, these plant parents have the experience to know more than the basics, but not enough to tackle the most difficult plant challenges. What’s right for them?

Get in a routine – The journey from beginner to intermediate begins with a healthy plant care routine. Instead of reminding yourself to water a plant, give it extra nutrients, or check the leaves, a care routine makes these things second nature. They happen as part of your week, so you don’t really have to think about them. You enjoy checking in with your plants, and eventually, you won’t need outside reminders at all. Part of your schedule includes time with your plants and making sure they have what they need. It becomes automatic and shows you’ve graduated to a new level of plant parenthood.

Take on a new challenge – When you first started caring for plants, you probably ruled out a few species that seemed too demanding or complicated to handle properly. You weren’t in a position to handle their requirements and didn’t have the confidence that you could help them thrive.

But that was then. Now you have more experience, and those beautiful species that you thought were too much for you are still there, waiting for you. Why not take on a new species or two that require a little more work, but have a look that you’d love to have in your home or workspace?

Philodendrons have a sharp tropical look that can upgrade the look of any area, but they aren’t set-it-and-forget-it plants. They need special attention with regard to pruning and you’ll want to watch out for pests. Philodendrons should also be kept away from children and pets who might want to eat their leaves.

Weeping figs are a bold-looking floor plant that also provides a moderate challenge to thrive. They need a good amount of indirect light and should be placed in soil that drains well. They like to stick to a watering schedule and benefit from regular fertilizer. And moving them around is a bad idea: If your weeping fig’s leaves start dropping, you’ll need to adjust your care to revive it. They might be a little more work, but it’s a good challenge for an intermediate plant parent.

Join a group! Getting involved in a plant community is a great way to meet other people at your skill level and see what challenges they’re trying. You’ll discover plants you never considered, and the support to keep adding new plants to your collection. And over time, you might just find yourself getting to an expert level of plant care.

Plant Parent Pros

You’ve tackled many different plant species with great results, and you know how to revive a plant that needs special care. You’ve even developed an eye for decoration and can find the right plant for the right space. What’s left for you? Plenty, if you’re willing to get creative.

Plants as art – Not all plants are confined to the area near their grow pot. Given enough room and guidance, they can climb and grow to really take over a space in a beautiful way. A Golden pothos, for example, can grow down the side of a bookcase or a desk, or drop down toward the floor from a hanging pot. You can also use a trellis to guide and shape where it goes, using your walls as additional space. It takes special care and a specific plan for the area, but you’re only limited by your creativity and how much of a statement you want to make artistically.

Try tougher plants – For a worthwhile challenge, you can also try a Zebra plant, which catches the eye with its white-steaked leaves and yellow blooms. It needs plenty of indirect light, but not direct light. It requires moist soil, but the pot has to drain well to avoid root rot, and you need to avoid getting water on its leaves. Also, it needs enough humidity that regular misting or a humidifier might be necessary. It’s not for beginners, but a Zebra plant can thrive when maintained in the hands of an expert. Or, if another challenging plant catches your eye, give that a shot. Keep testing yourself and you’ll be amazed at what you can accomplish with your plant collection.

Share the love – Are there beginners in your circle of friends and family that might benefit from your expertise? Do you know someone who needs the mental and emotional benefits plants can provide? Does someone need a change of scenery, new décor, or could use fresher air in their living or workspace? You can use what you know to help others.

Encourage people in your life to learn more about plants, or offer to help introduce them to an interest that gives back on many levels. A simple gift (haven’t plants always been great gifts?) could be just the thing to put them on a positive lifelong journey, and with your advice and help they’re almost assured of success. Using what you know to instill an interest in others is a wonderful way to keep the love of plants thriving, and you might even help turn beginners into experts someday.

Plantz.com: Your Partner at All Stages

At Plantz.com, we have decades of experience caring for, selling, maintaining, and delivering the very best plants to our dedicated customers. But most of them don’t have (or need) our level of knowledge. They have us to assist them with their needs every step of the way.

For beginners, we can answer any questions you have and get you started on the road to plant parenthood with hard-to-kill starters that will help increase your love for plants. We’ll help you pick the species for you, and send them to you quickly and safely, with careful packaging so you’re ready to go right out of the box.

For intermediate plant parents, we can help you get to the next level with an assortment of plants that will provide some challenges, and reap some great benefits once they’re thriving in your home or workspace. We can recommend and send the right plant for you to up your skills and care, and improve your décor at the same time.

For experts, we have the right plants to let your creative mind flow and really stretch out your knowledge base so you can expand your area with plenty of lush, green additions. We can answer expert questions and make the right suggestions for your individual needs. Whatever you’re looking to accomplish, Plantz.com can get you set up with everything necessary to accomplish your new goals. And, over time, if you have more questions or need suggestions, we’re here to help.

We also have a wide selection of accessories and tools to help you get the look you want from your plants, and keep them thriving over time. From planters and moss to enhance the look of your species in your home or workspace, to liquid plant food to provide the nutrition your plant needs, we’ll provide the assets required for plant parents to thrive in their journey along with their selections.

Additionally, the PlantAssure system provides sub-irrigation technology to extend and perfect your plant’s watering interval, and help you avoid the pitfalls associated with overwatering or underwatering. Whether you’re concerned about making a mistake, or you have more experience but want to save yourself some time, the PlantAssure system can help provide some stability and security in a critical area for plant health. And the Soil Sleuth can help you check your plant’s soil with precise accuracy, ensuring it has the right level of moisture for that species. With our expertise and tools, you’ll be in great shape to take advantage of everything plants can offer your space.

If you have questions, we can help. Just use our contact form to get the conversations started!